


General Settings
Before starting your stream, please set your preferences and ensure that your stream health is fine.
Targets screen:
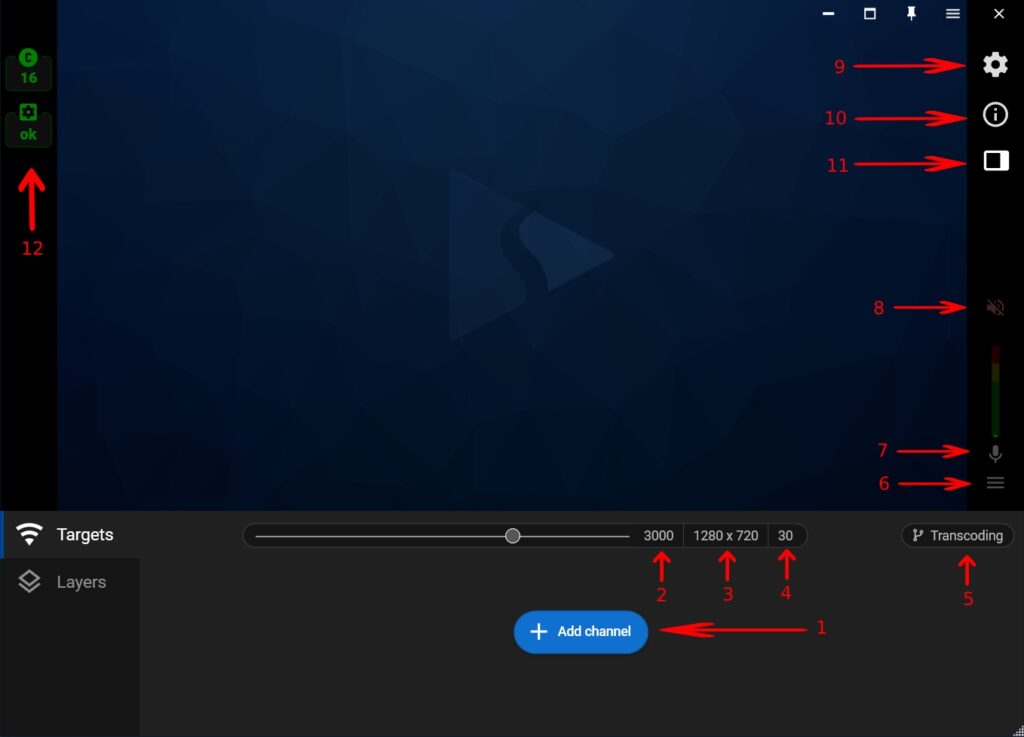
1) Add channel. Add one or several channels you want to stream to. Read more channels set up.
2) Bitrate. Move the scroll bar to change the bitrate value. To increase your bitrate limit, upgrade your pricing plan. Read more about bitrates.
3) Resolution (To see the option, move the mouse cursor to the video screen). Change your scene resolution by choosing it from the list.
4) Frame rate (To see the option, move the cursor to the video screen). Choose the frames per second number from the list. We recommend choosing “30” or higher.
5) Transcoding. With this feature, you can set different settings for your streaming channels.
6) Audio source. If you have several audio microphones, please select the needed one.
7) Microphone volume. Please set the needed level of microphone volume for your stream. You can also mute your microphone by clicking on Mic icon.
8) Desktop volume. Besides your microphone, you can also use the sound from your computer. Please set the needed volume level for it, or mute it by clicking on the Audio icon.
9) Additional settings. Encoder and other settings for experienced users.
10) Application info. The current version, the server that you’re connected to, and other information about Streamster and your system.
11) Layout (To see the option, move the cursor to the video screen). Select the preferred layout of the application: No preview (hides video preview and saves your processor resources), Standard, Preview, and states, Preview only (shows video only without any settings). Besides, you can change the size of the application window for the best experience.
12) Stream health indicators. Make sure that all streaming indicators are green.
