


Create Stream Overlay for OBS Studio
Step 1. Create free account with Streamster and log in to the web app at https://app.streamster.io/login
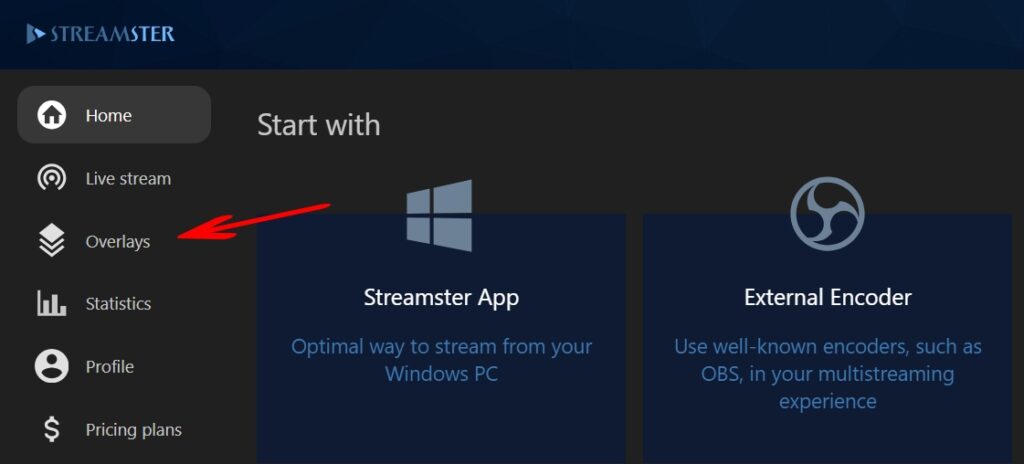
Step 2. Enter the “Overlays” section in the main menu.
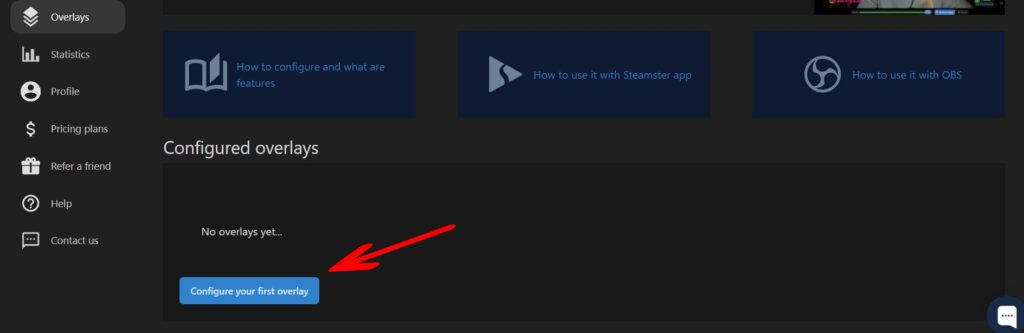
Step 3. Click the “Configure your first overlay” button to start creating an overlay for your video or live stream.
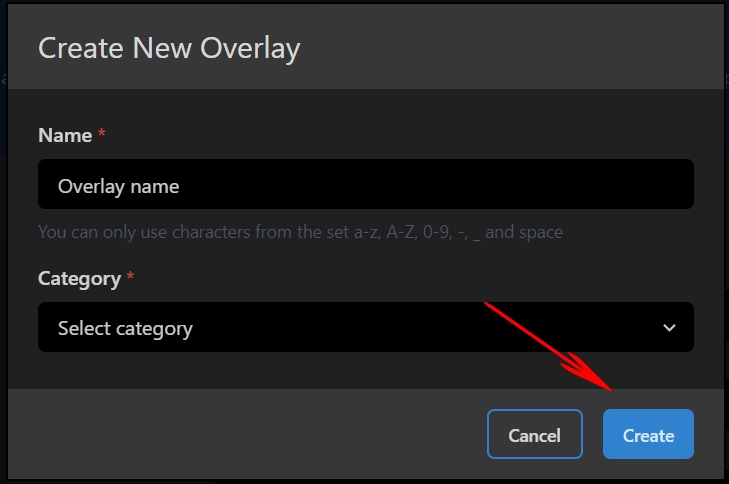
Step 4. Type the name for your overlay, select its category, and click the “Create” button. Please note, that the list of available overlay templates depends on your chosen category. The category can’t be changed once the overlay is created.
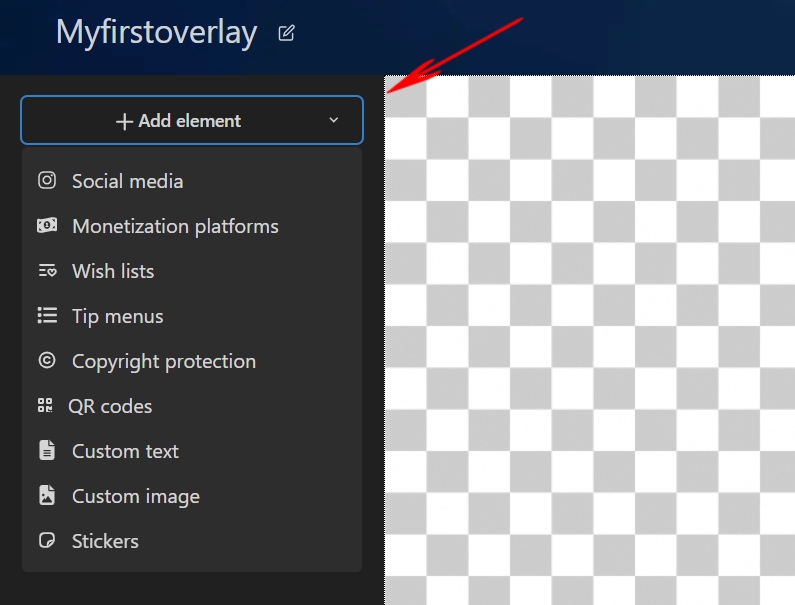
Step 5. Click the “+ Add element” button to choose the element type. You can find more information about available types of elements here.
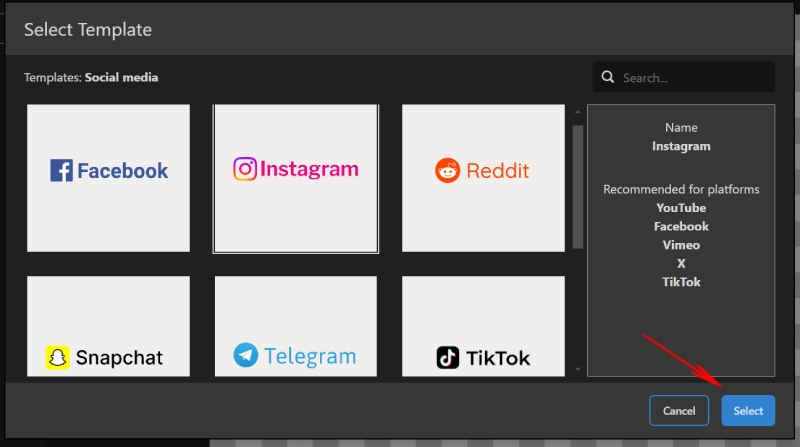
Step 6. If available, choose the template for this element and click the “Select” button.
Step 7. Customize your element. You can find more information about the Overlay Editor features here.
Step 8. Your overlay may consist of several elements. Thus, you can add more elements if needed.
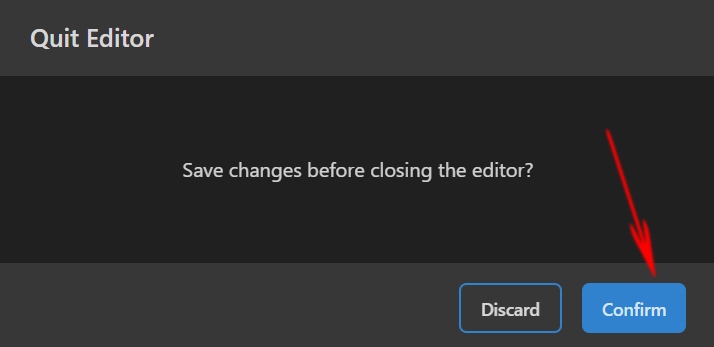
Step 9. Once the overlay is fully customized, save it and exit Editor.
Step 10. Find the link for your overlay and copy it.

Step 11. Open your OBS Studio or any other streaming app that supports adding web pages as the video source.
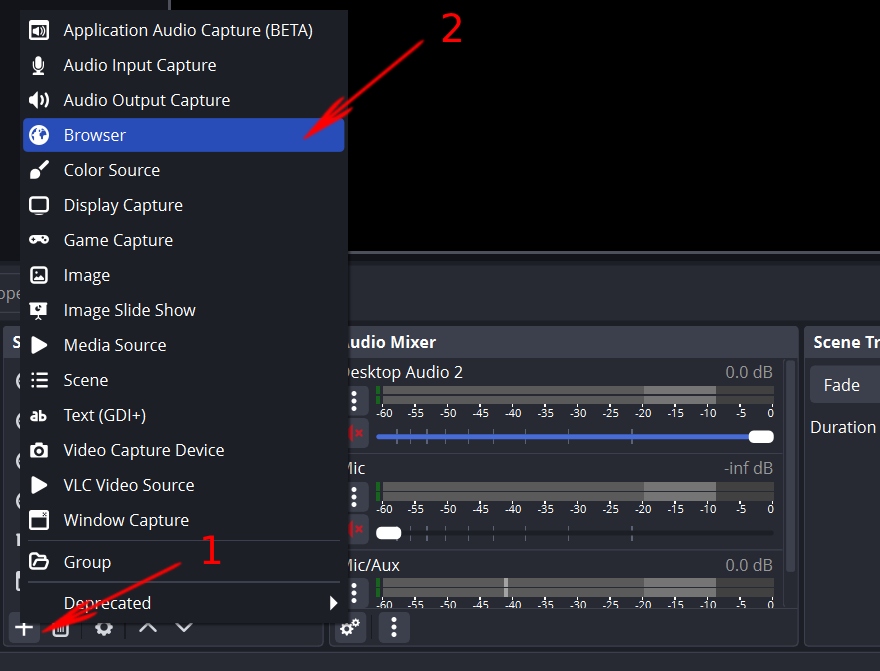
Step 12. Add a new video source (1) and select the “Browser” option (2).
Step 13. Copy your overlay URL (1). Set Width as “1920” (2) and Height as “1080” (3). Click the “OK” button (4).

