Getting started
Articles
Download & Sign Up
Step 1. Download and install Streamster mobile app. It is available for free on:
Step 2. Creating a Streamster account. Use the “Create account” button in your mobile app or the “Sign up” button on the streamster.io website.
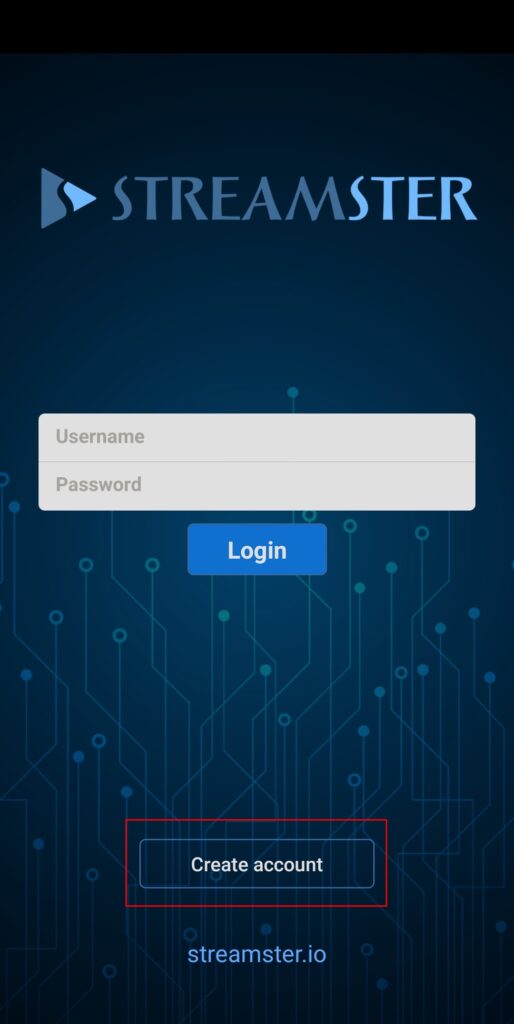
Please note, that you should create one account for all Streamster products. Thus, if you previously created and account to use Streamster desktop or web apps, please use the same credentials for the mobile app.
Setting Up Streaming Channels
Step 1. Launch Streamster Mobile app with your credentials.

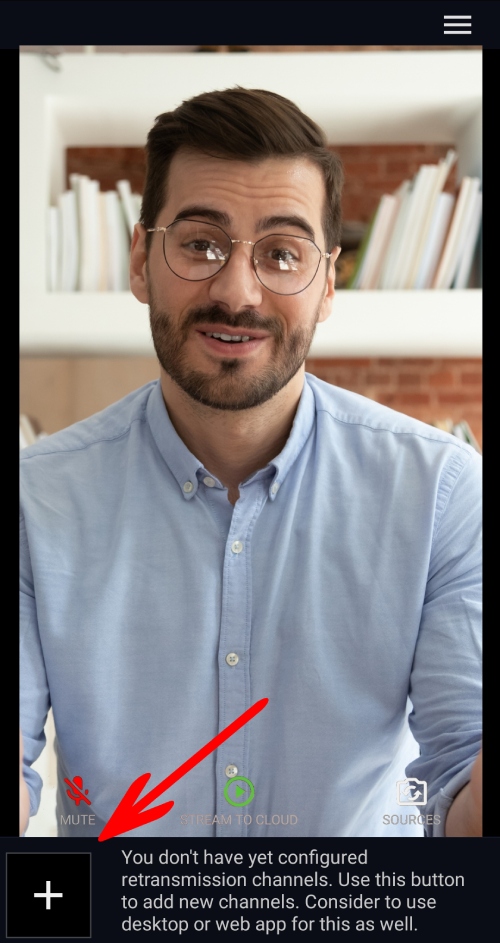
Step 2. Tap the “+” button to create your first streaming channel
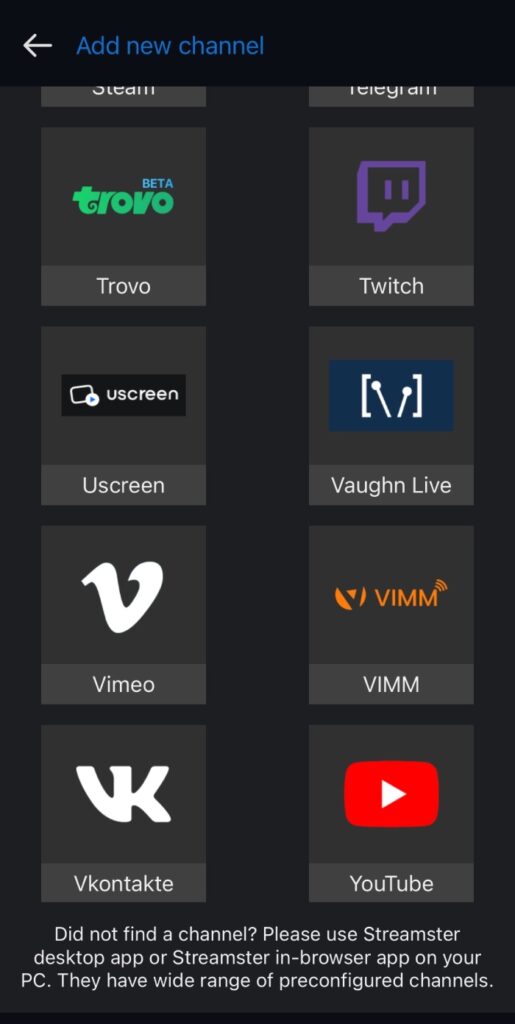
Step 3. Select the needed streaming platform from the list. If you can’t find the required platform but it supports RTMP streaming, or if you use the custom streaming server, please select the “Custom” channel.
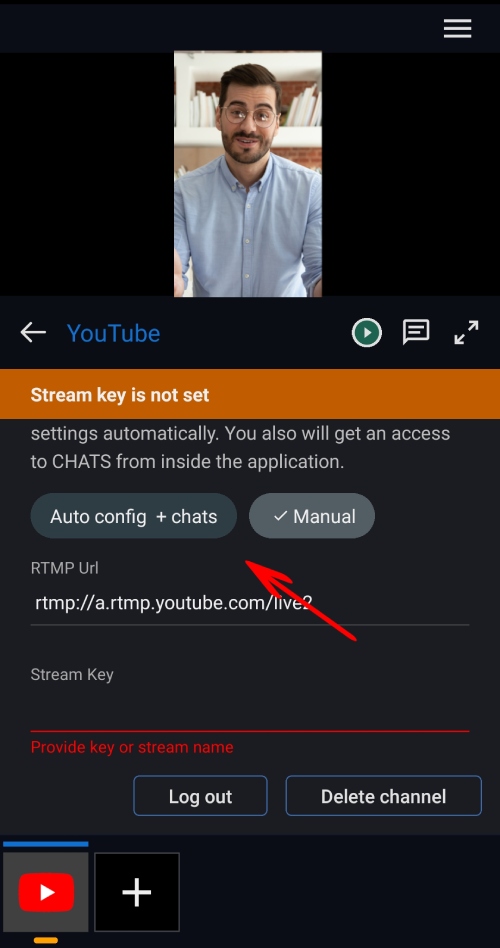
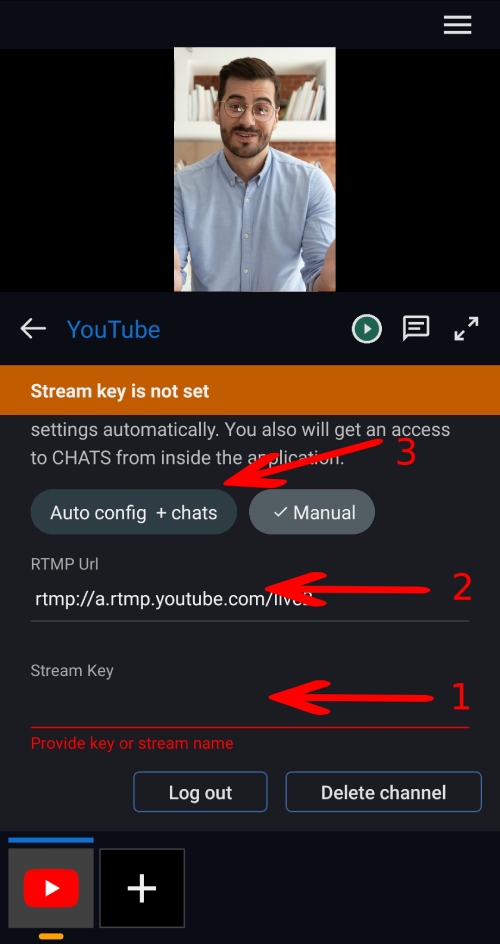
Step 4. Depending on the streaming platform you choose, paste your Stream Key (1), RTMP Url (2) and Stream Key (1). Alternatively, use the login/password authentication method (3) if it is available for the chosen platform.
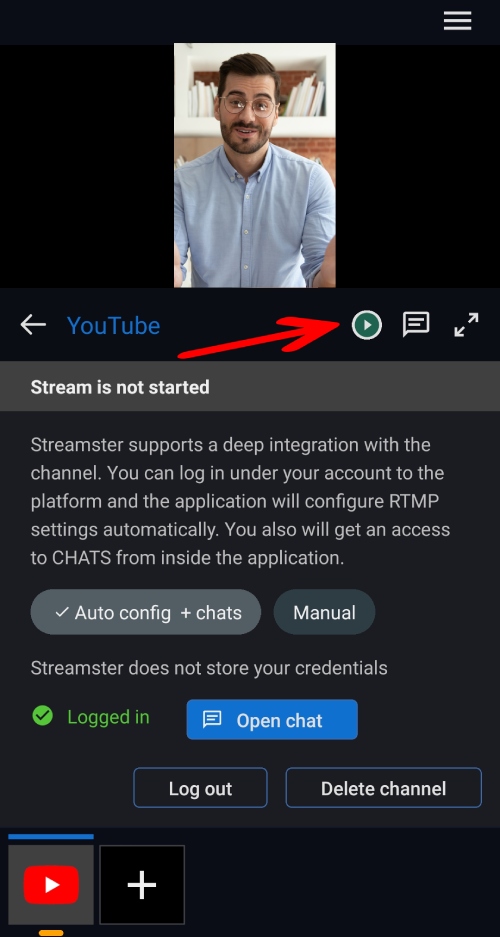
Step 5. Once all set, click the “Play” button to start stream to the platform
Step 6. If needed, setup more channels by clicking the “+” button once again.
Streaming from the Mobile Device
Step 1. Launch your Streamster mobile app.
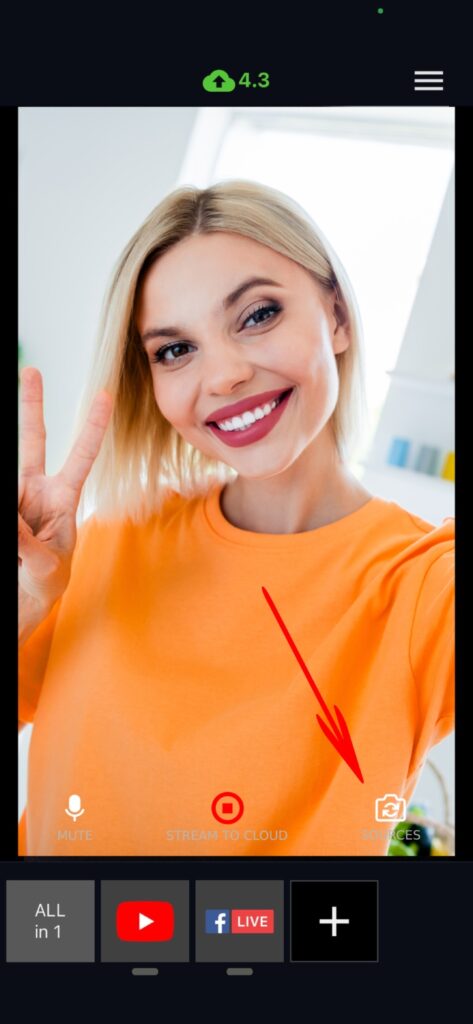
Step 3. Swipe your video preview up or down to switch between your front and back cameras.
Step 4. Type on the icon of streaming channel you want to start streaming to.
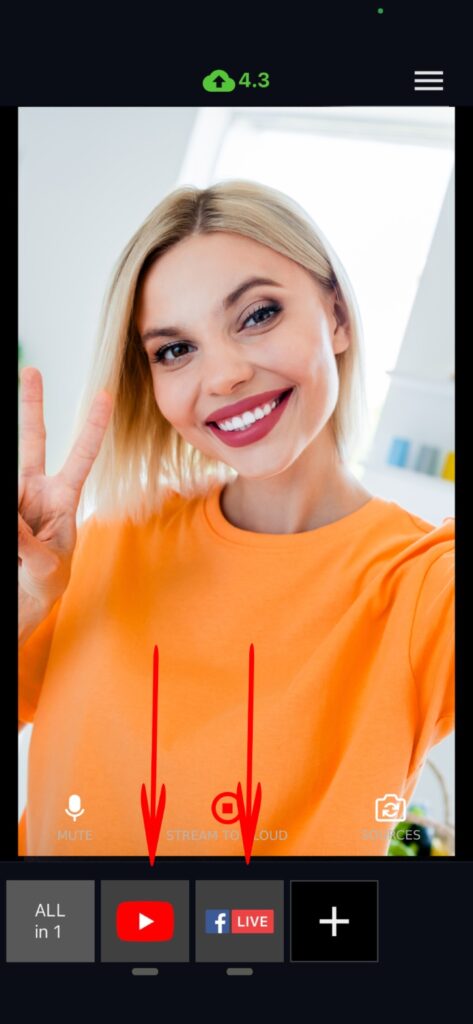
Step 5. Type on the icon of streaming channel you want to start streaming to.

Streamster Remote (with Streamster desktop app)
Step 2. Download and launch your Streamster desktop app with your credentials.
Step 3. Set up your streaming scene.
Step 4. Set up your streaming channels.
Step 5. Launch your Streamster Mobile app using your account credentials.
Step 6. Click the “Start streaming” button on your desktop or mobile app. Once the connection is established, your web camera preview is displayed on your mobile device.
Step 7. Use your mobile device to control your stream:
Start/Stop stream to platforms
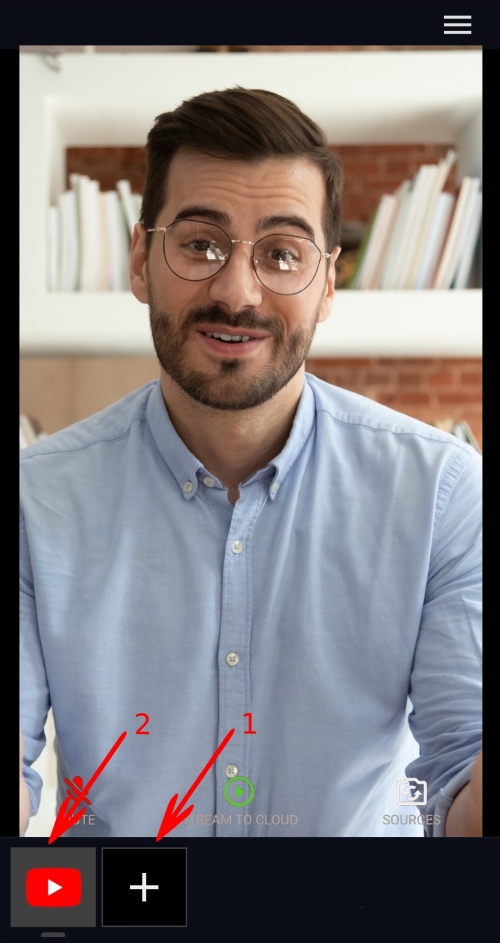
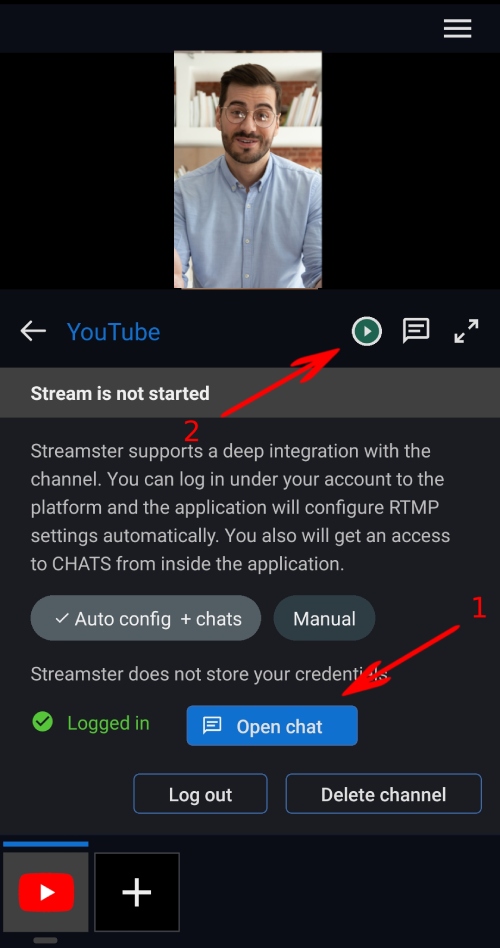
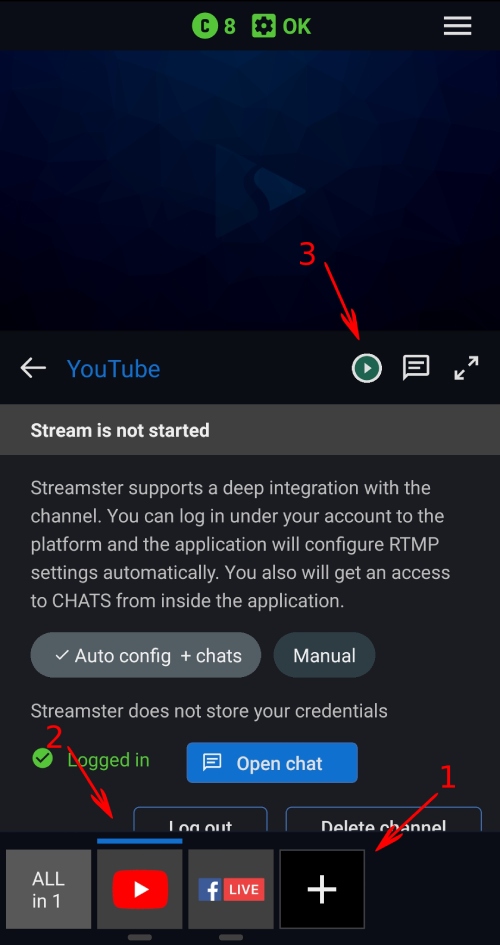
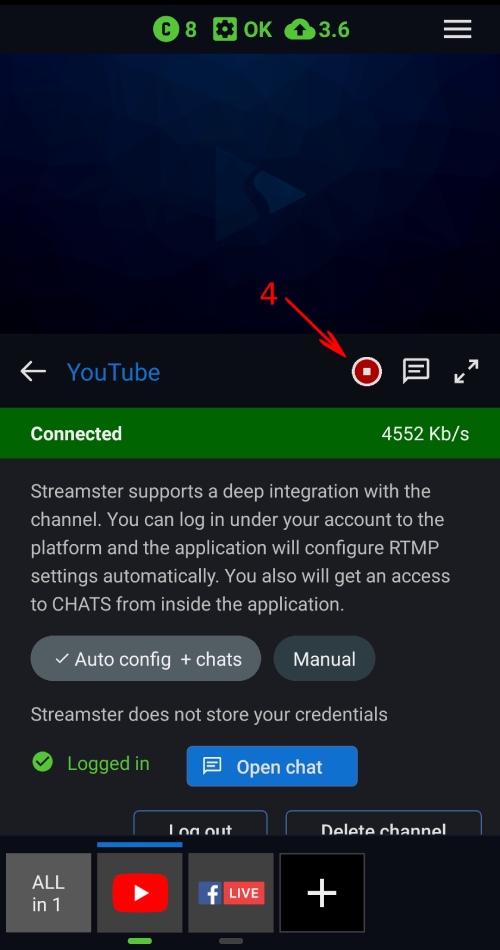
Create a new channel and set up a streaming platform if it hasn’t been done yet (1). Tap on the platform logo at the bottom of the screen (2). Tap the “Play” button to start the stream to this platform (3). Tap the “Stop” button to stop your stream (4).
Communicate in chats (please note that this feature is available for certain platforms only)
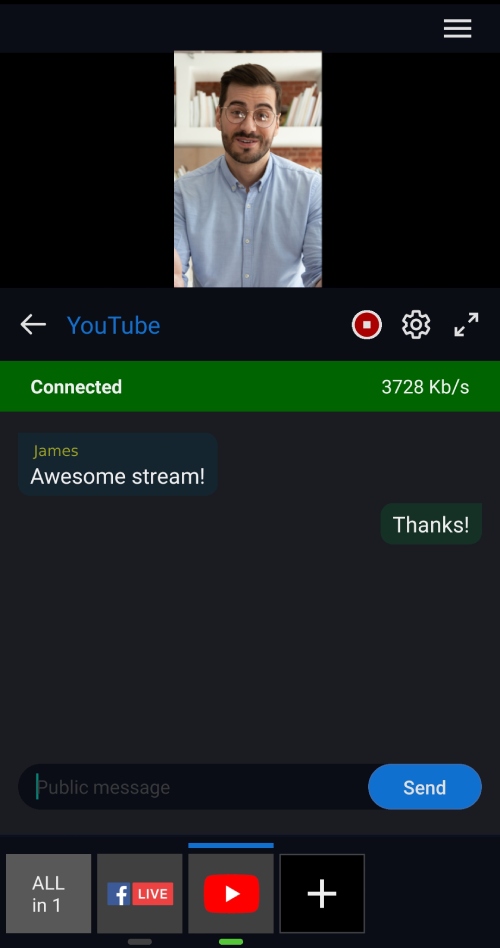
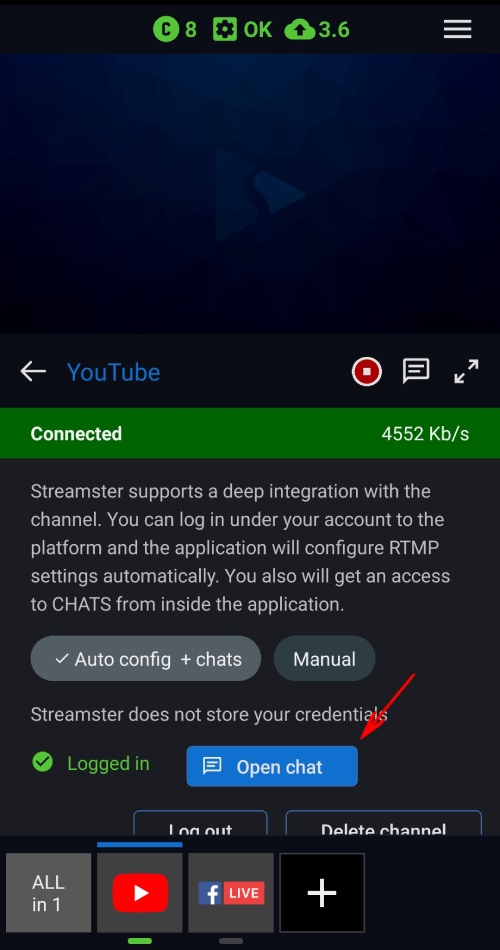
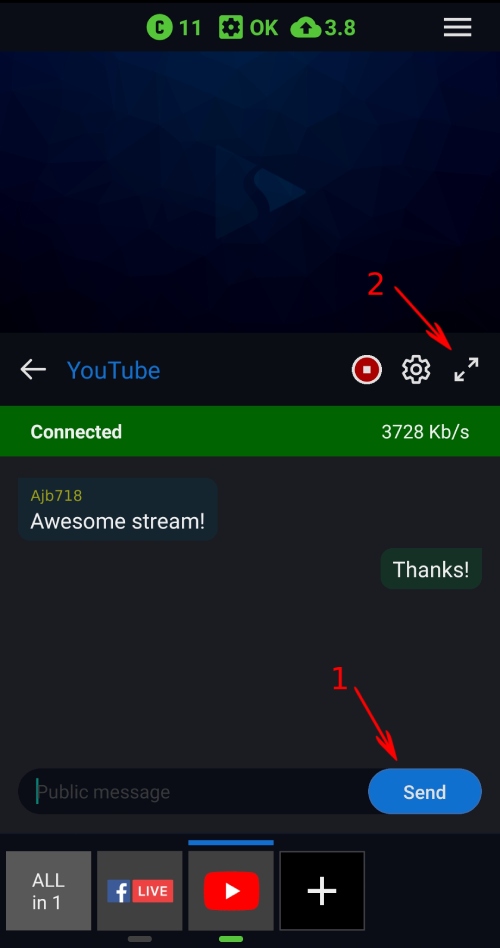
With Streamster mobile app, you can read chat messages (including private ones), receive information about some events on the platform, and write messages for your audience. Once the channel is set up in “Auto config + chats” mode, click the “Open chat” button. To write your message, type it and click the “Send” button (1). To stretch the chat section full screen, click the “Expand” button (2).
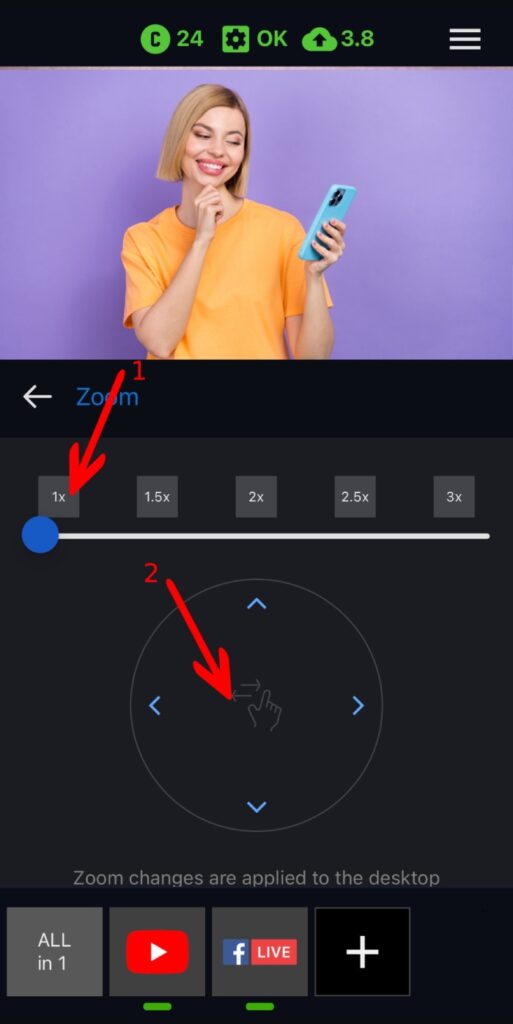
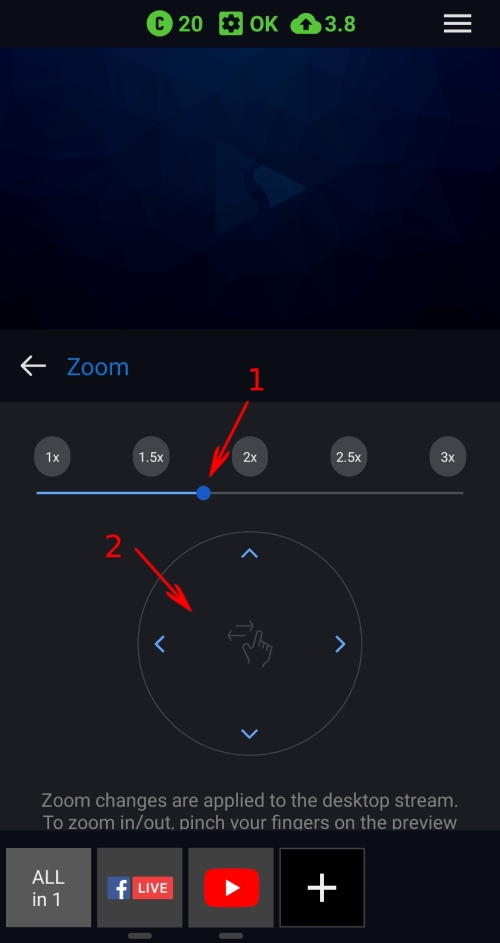
Zoom your camera
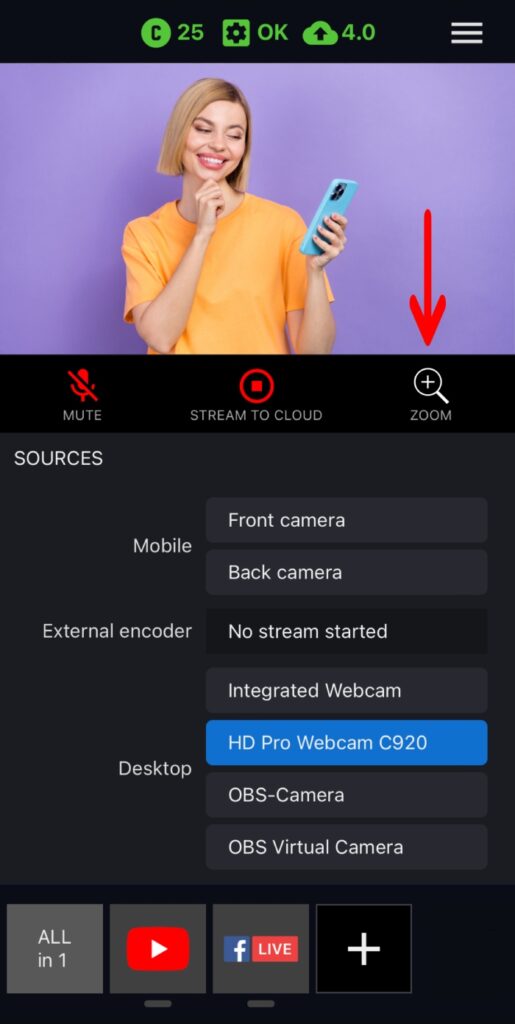
To zoom in/out your web camera, return to the main screen and tap the “Zoom” button. Zoom in or out (1) and move your frame with the controller (2).
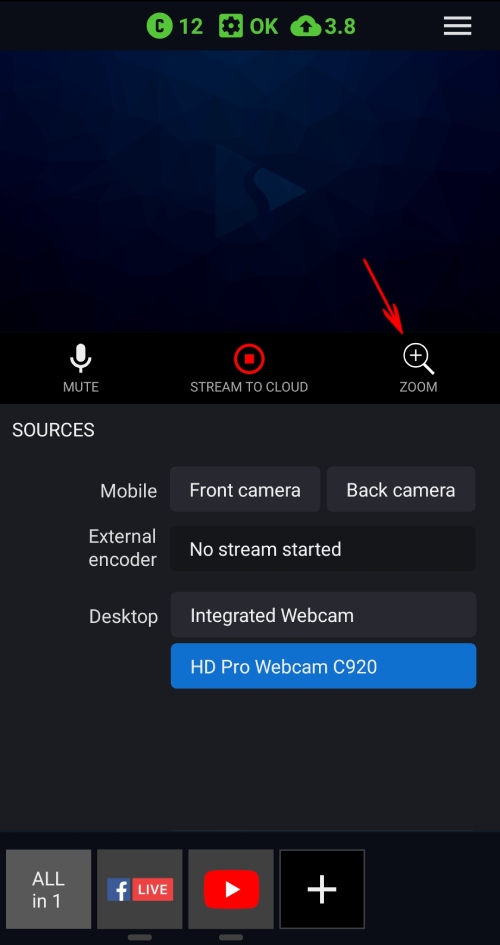
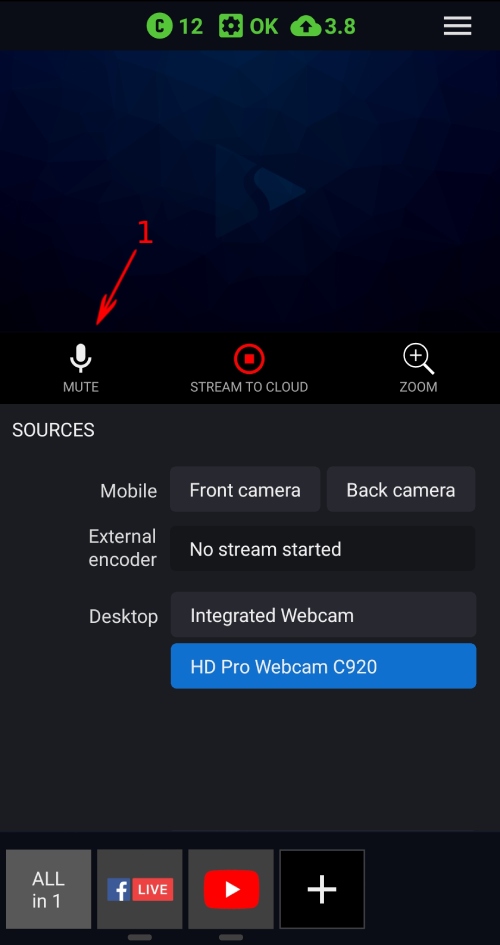
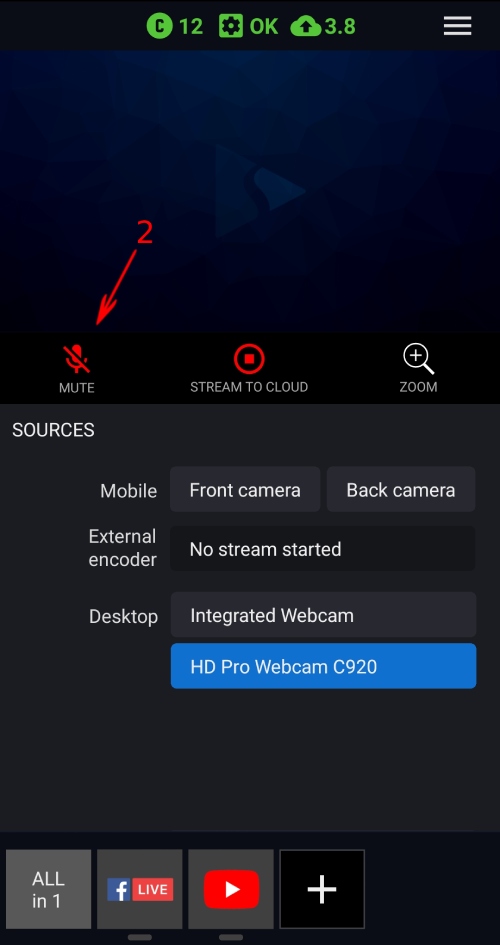
Mute your audio
To mute your audio, click the “Mute” button on the main screen (1). Click it once again to unmute (2).
Monitor your live stream health
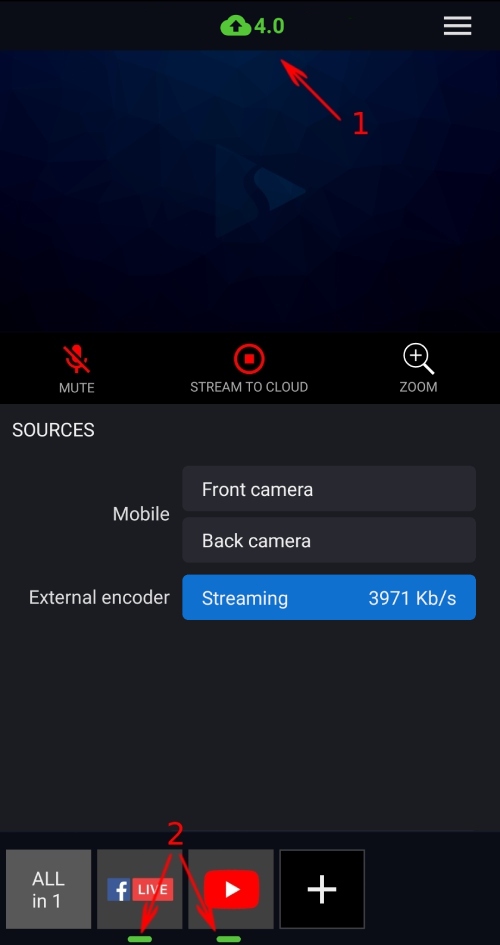
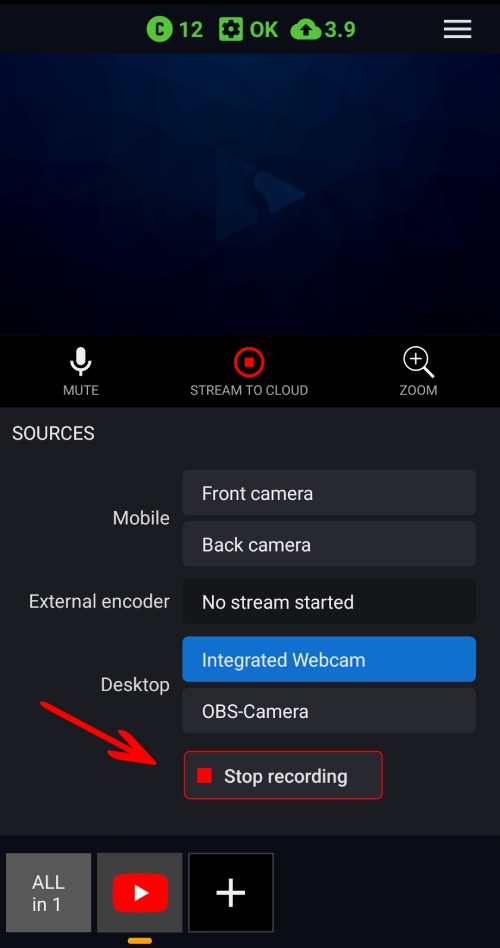
Check the quality of your stream to the cloud on the bar above the video preview (1). It includes your CPU load, encoder load, and bitrate. If all indicators are green, your stream goes flawless. Check your stream status on each platform with indicators at the bottom of the screen (2). If channels are set up correctly, and you are online, indicators are green.

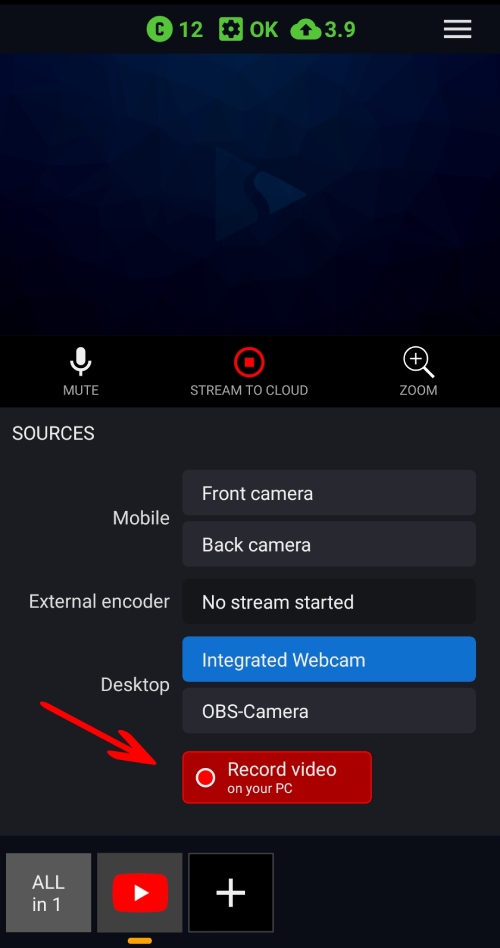
Record your stream
Click the “record video” button to start and stop recording your video or live stream. The video will be saved locally on your PC.
Streamster Remote (with OBS Studio)
Step 2. Log in to the Streamster web app at https://app.streamster.io/
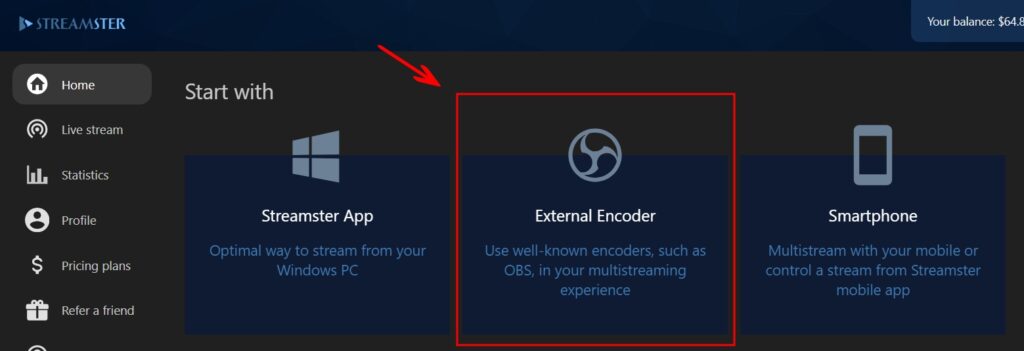
Step 3. Click on the “External Encoder” banner.
Step 4. Open your OBS Studio.
Step 5. Set up your stream in OBS. Important: Make sure that your encoder settings correspond to Streamster’s requirements.
Step 6. Click “Settings” and select the “Stream” option.
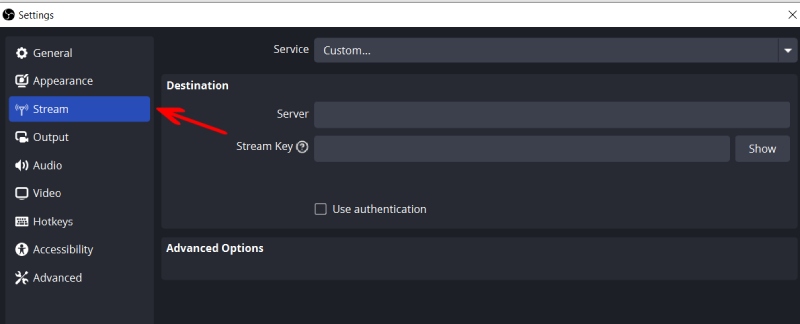
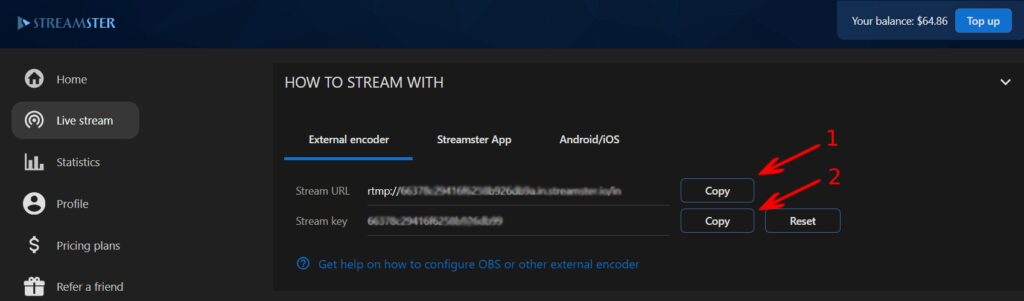
Step 7. Copy the “Stream URL” field input (1) from Streamster web app to the “Server” field in OBS. Then, copy the “Stream key” field input (2) to the “Stream Key” field in OBS. Click “Ok” in OBS to save settings.
Step 8. Start your live stream in OBS.
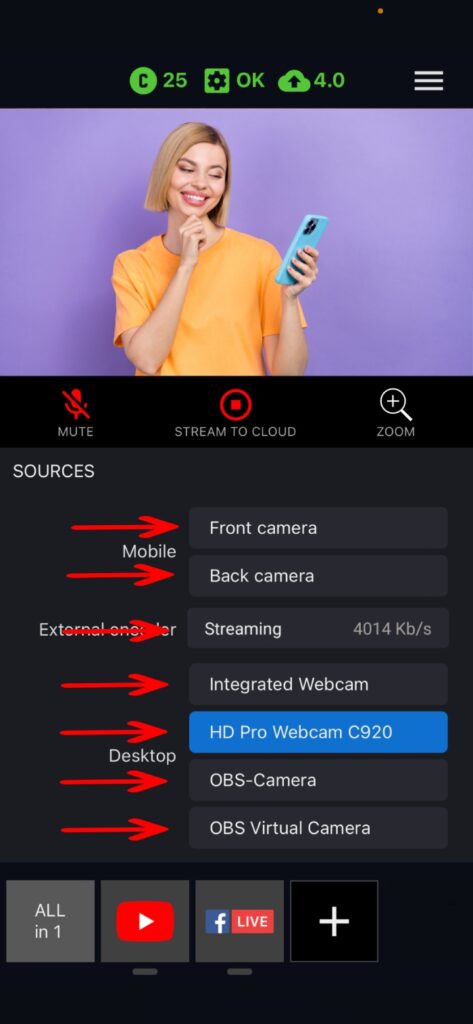
Step 9. Launch your Streamster Mobile app using your account credentials. If everything was set up correctly, you will see your OBS stream preview on your mobile device.
Step 10. Set up your streaming channels (platforms to which you want to stream). You can do this either in the Streamster web app or in the mobile app.
Step 11. Use your mobile device to control your stream:
Start/stop stream to platforms
Create a new channel and set up a streaming platform if it hasn’t been done yet (1). Tap on the platform logo at the bottom of the screen (2). Tap the “Play” button to start the stream to this platform (3). Tap the “Stop” button to stop your stream (4).
Communicate in Chats
Communicate in chats
Please note that this feature is available for specific platforms only.
With Streamster mobile app, you can read chat messages (including private ones), receive information about some events on the platform, and write messages for your audience. Once the channel is set up in “Auto config + chats” mode, click the “Open chat” button. To write your message, type it and click the “Send” button (1). To stretch the chat section full screen, click the “Expand” button (2).
You can also use “All in 1” feature to see chats from all platforms you are streaming to on one screen.
Monitor your stream health
The bitrate indicator (1) shows the health of your network.
The channel indicator’s color (2) shows your current stream status: green means your stream is going smoothly.