Getting Started
Part 1. Setitng Up Tip2Peep in Streamster Desktop App
Step 1. Launch Streamster desktop app
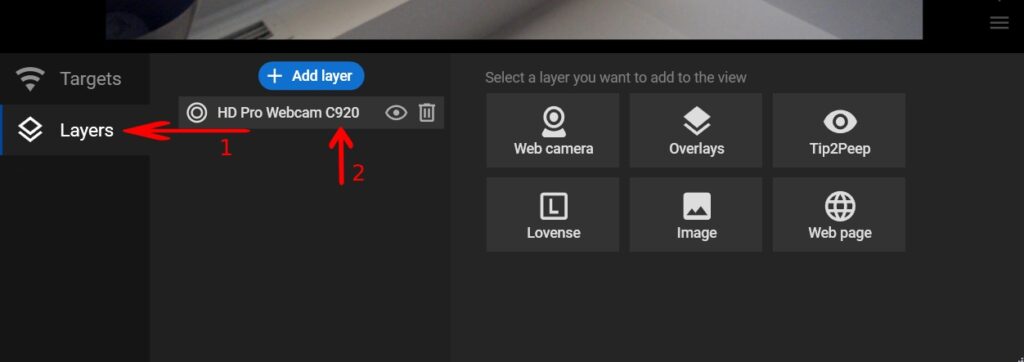
Step 2. Open the “Layers” tab (1) and ensure that correct web camera is selected as your main camera (2).
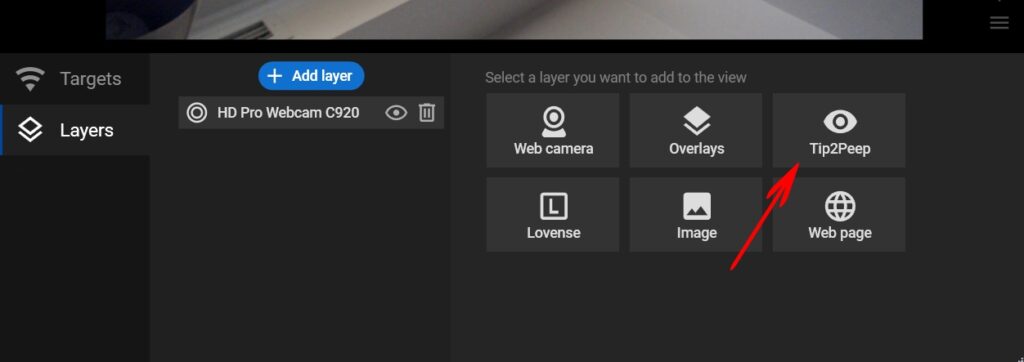
Step 3. Select the “Tip2Peep” video source.
Step 4. Select the camera that should be activated by the tip (1). Type the amount of tip to activate the camera (2). Select the duration for the Tip2Peep camera is active after the specific tip is received (3). Also, set up your Tip2Peep camera feed: change its position and size on your streaming scene or click the “Maximize” button (4) to cover 100% of your stream.

Part 2. Setting Up Tip2Peep Overlay
Step 5. Go to Streamster Overalys
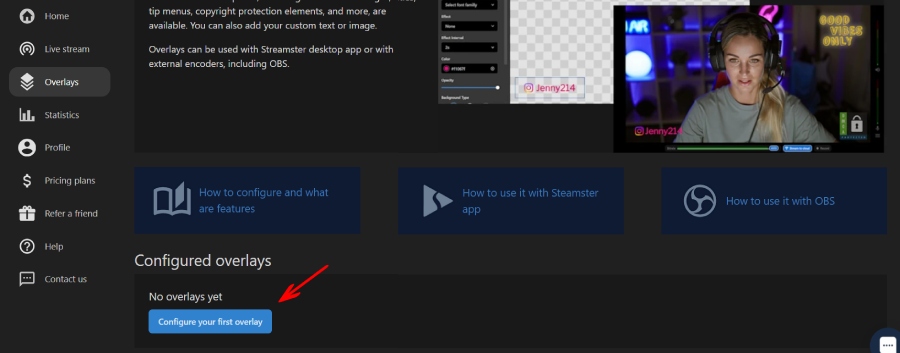
Step 6. Click the “Configure your first overlay” button
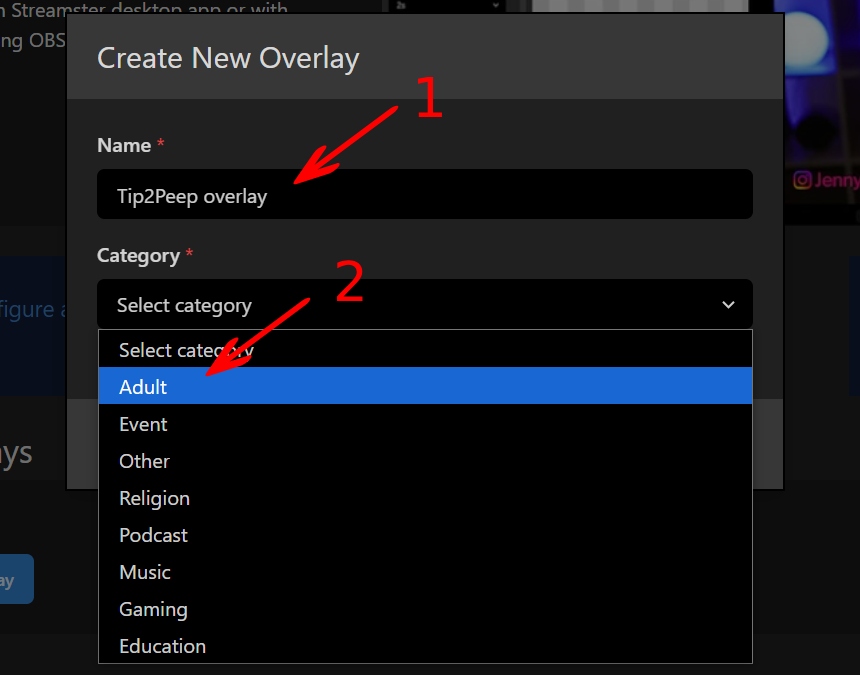
Step 7. Type the custom name for your overlay (1). Select the “Adult” category for your overlay (2). Click the “Create” button.
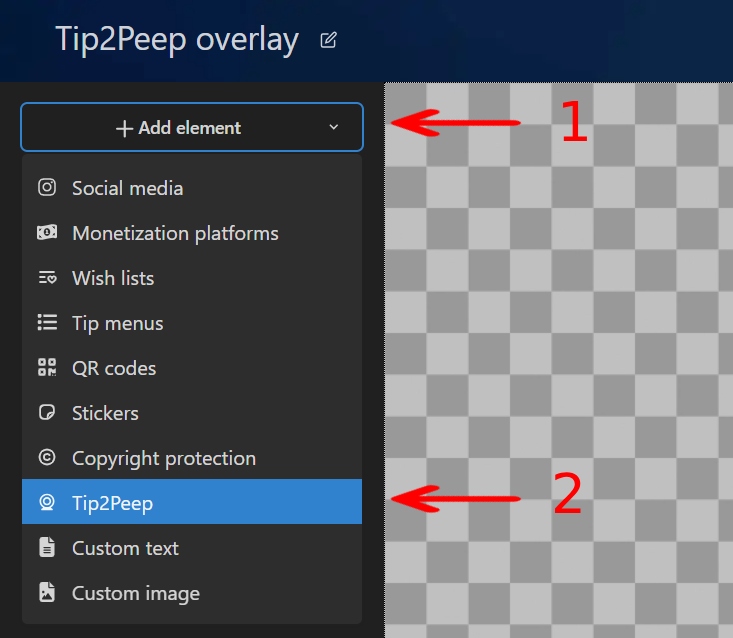
Step 8. Click the “Add element” button (1) and select the “Tip2Peep” option from the list (2).
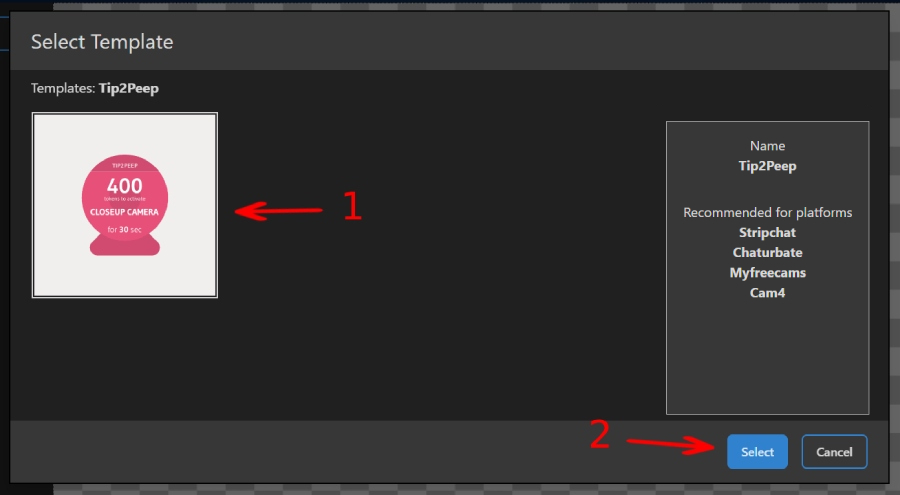
Step 9. Click on the template (1) and press the “Select” button (2).
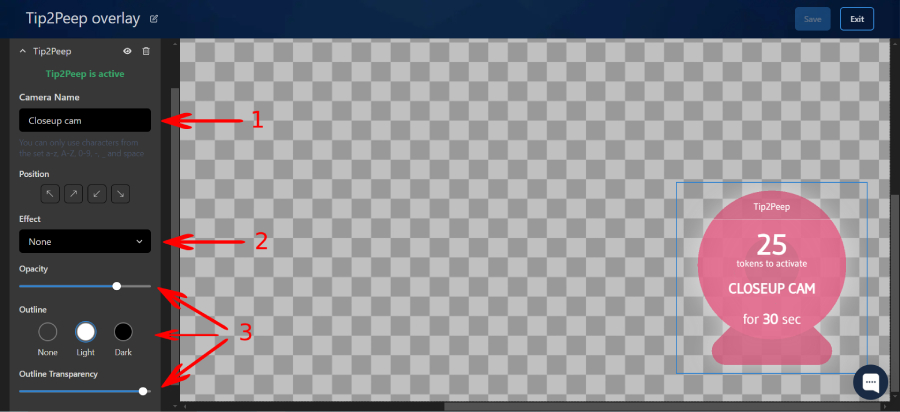
Step 10. Set up your overlay. Type your camera name (1): we recommend naming your camera to help the viewer understand what to expect from the camera switch. Place your overlay on your streaming scene: move it within the editor area or use position arrows (2). Also, you can apply effects to your Tip2Peep overlay, e.g. transparency or outline (3).
Step 11. Click the “Exit” button in the top right corner and confirm the changes.
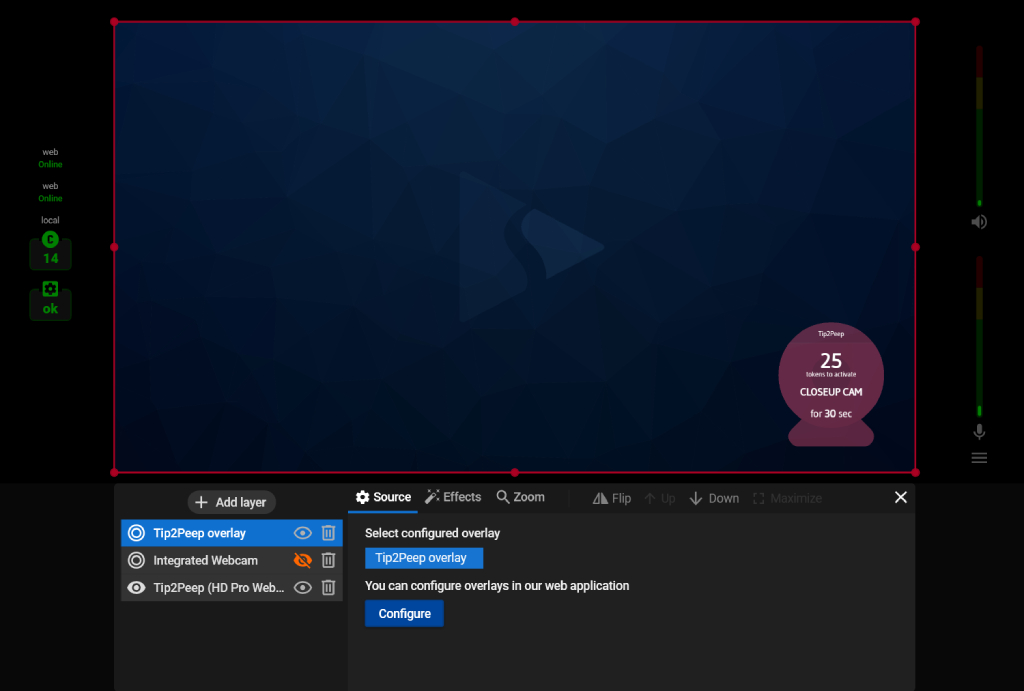
Step 12. Go back to the Streamster desktop app and click the “Add layer” button.

Step 13. Choose the “Overlays” option and select your overlay from the list.

Tip2Peep overlay should appear in your video preview.
Part 3. Setting Up Channels and Starting Your Stream
Step 14. Click the “Add channels” button to set up your stream to the site.

Step 15. Select one of the platforms with the chat feature available (they are marked with the red “Chats” label)

Step 16. Click the “Login & Forget” button.
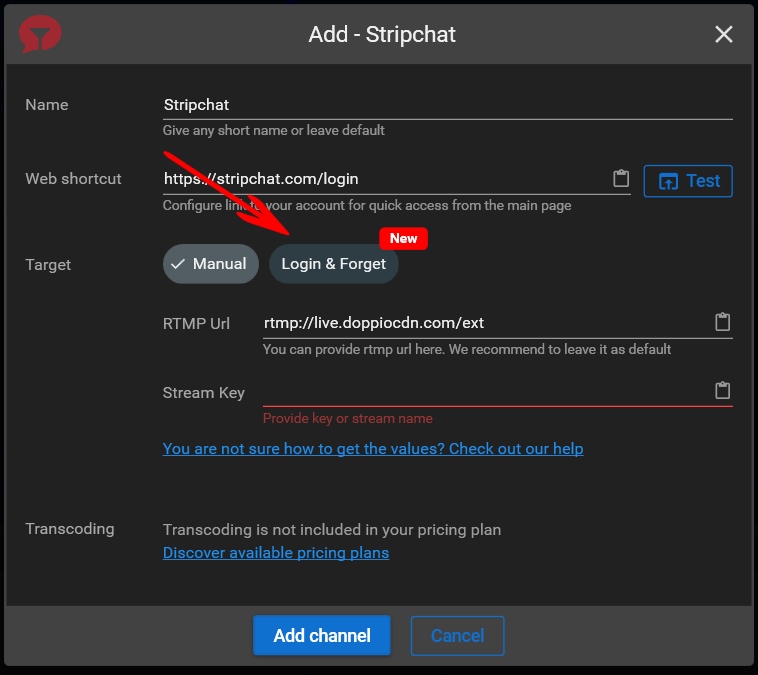
Step 17. Click the “Login” button.
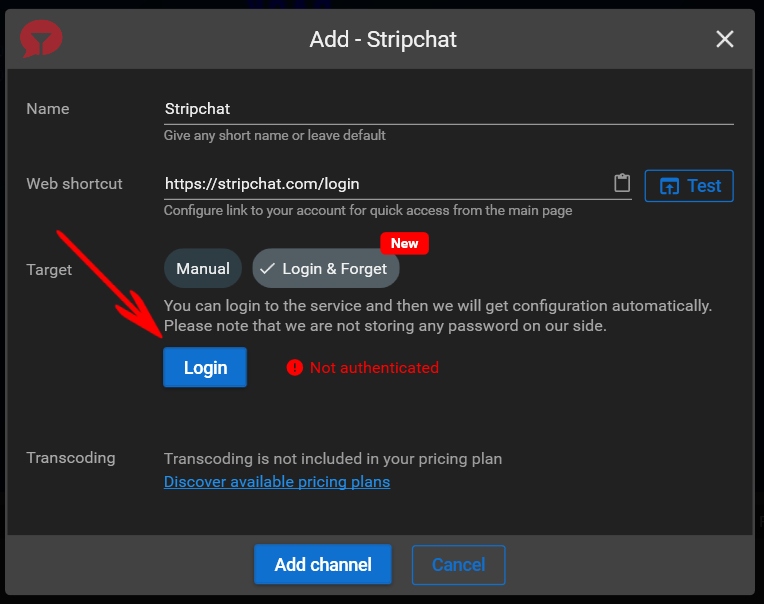
Step 18. Enter your platform credentials to authenticate.
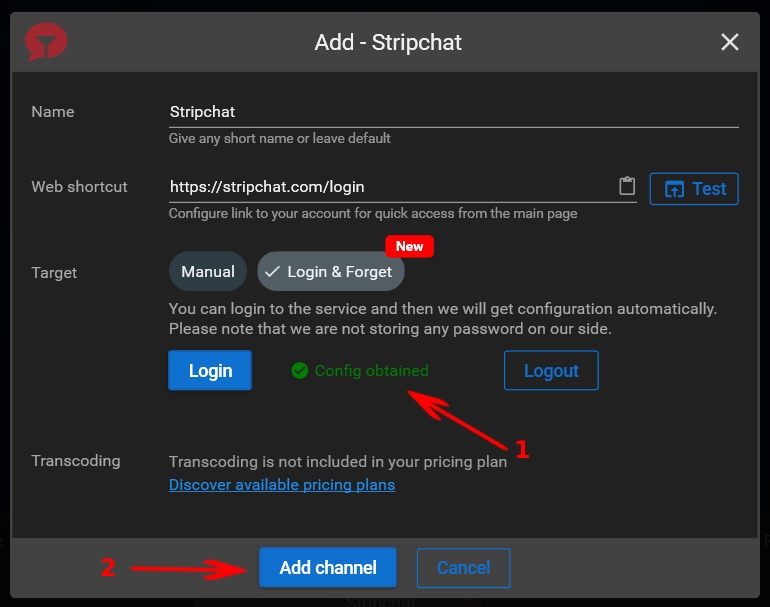
Step 19. If the authorization is successful, you can see a “config obtained” notification (1). Click the “Add channel” button (2).
Step 20. Open the “Chats” tab and click the “Connect” button for the sites on which you want to use the Tip2peep feature.

Step 21. To start the stream to the sites, go back to the “Targets” tab and click the “Play” buttons.


