Getting started
Articles
- Creating an Account
- Managing Your Account
- Starting Your Stream with OBS
- Required Encoder Settings for OBS
- Setting Up Streaming Channels
- Starting Your Stream with Mobile Device
- Starting Your Stream with GoPro
- Starting Your Stream with Zoom
- Starting Your Stream with Wirecast
- Getting Started Video Tutorial
Creating an Account
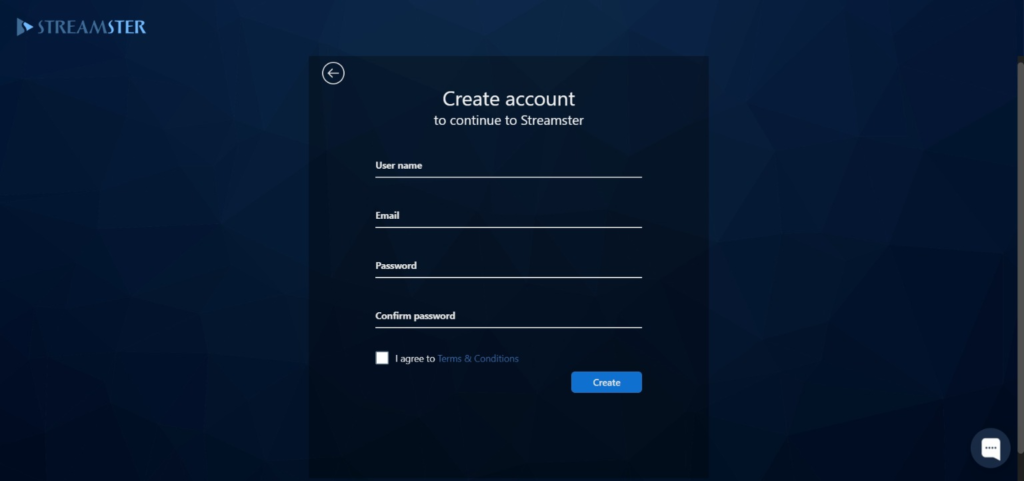
To start using the web app user registration is required. The signup page is https://app.streamster.io/register
Please note, that the username which you’ll use to log in to your account may be different from your e-mail. Make sure that you will not forget it.
If you need to create a business account for multiple users, please read the “Create a business account” article.
Managing Your Account
Documentation about managing your Streamster account with the web app can be found in the “Account” section.
Starting Your Stream with OBS
Streamster web app can be used for re-streaming only. This means that the streaming scene is required to be created in the external encoder and broadcasted to Streamster servers. Once we receive your stream, you can use our multistreaming and transcoding services in your browser. But first, you need to set up your external encoder.
Step 1. Log in to the Streamster web app at https://app.streamster.io/
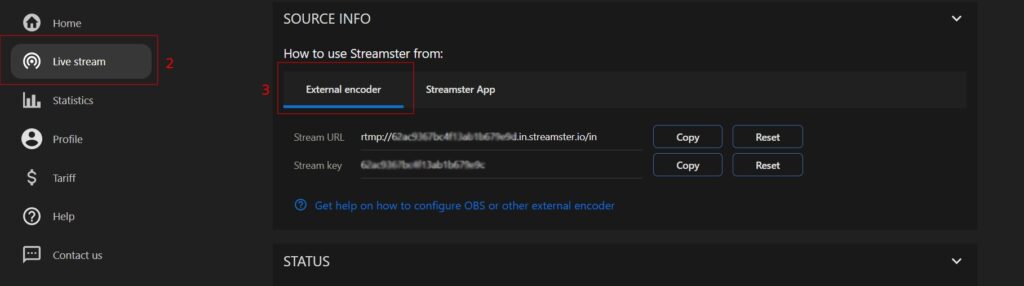
Step 2. Choose the “Live Stream” section.
Step 3. Make sure that the “External Encoder” tab is active.
Step 4. Open your external encoder and set up your scene.
Step 5. In OBS click “File“ – “Settings” and choose the “Stream” tab.
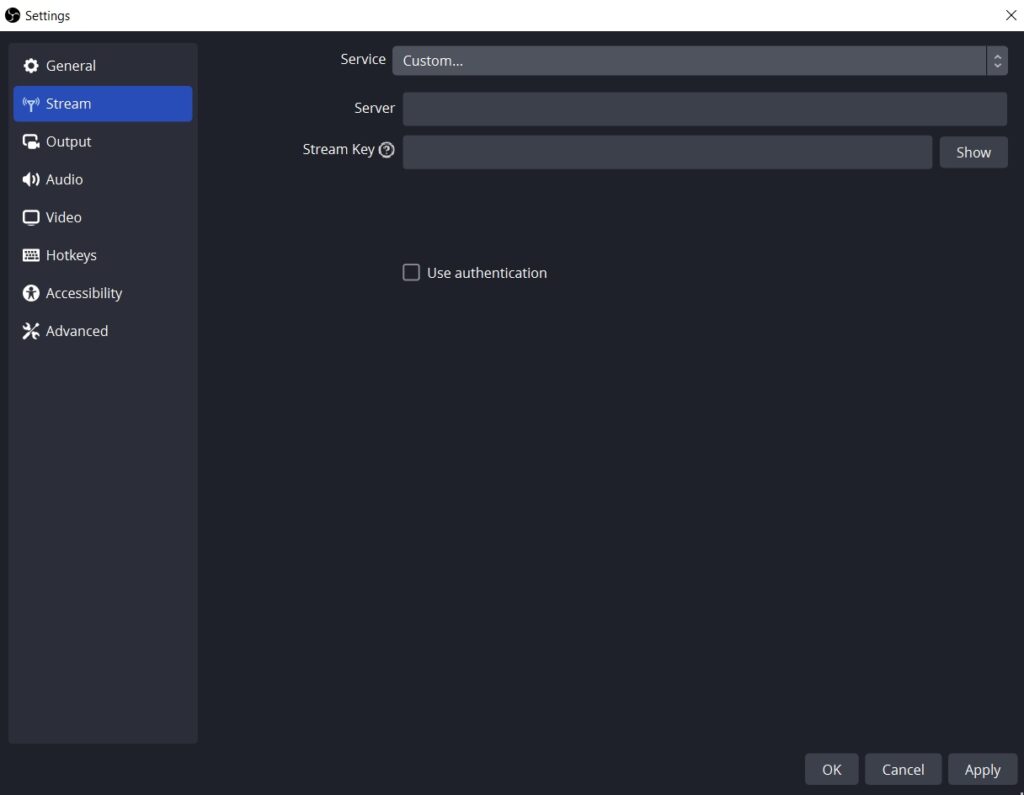
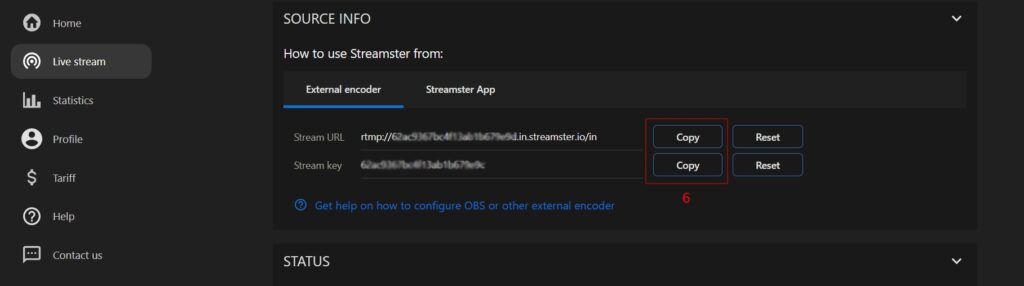
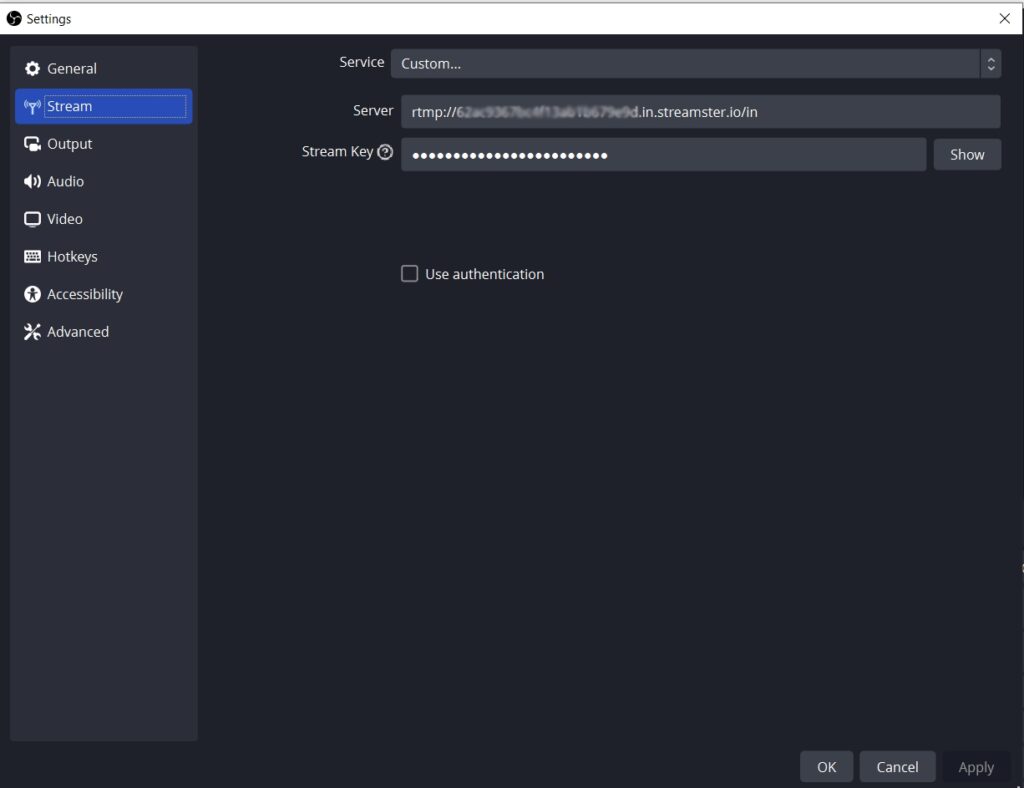
Step 6. Copy the Streamster “Stream URL” field content to the “Server” field in OBS, and “Stream Key” field content to the “Stream Key” field.
Step 7. Press the “Start Streaming” button in OBS.
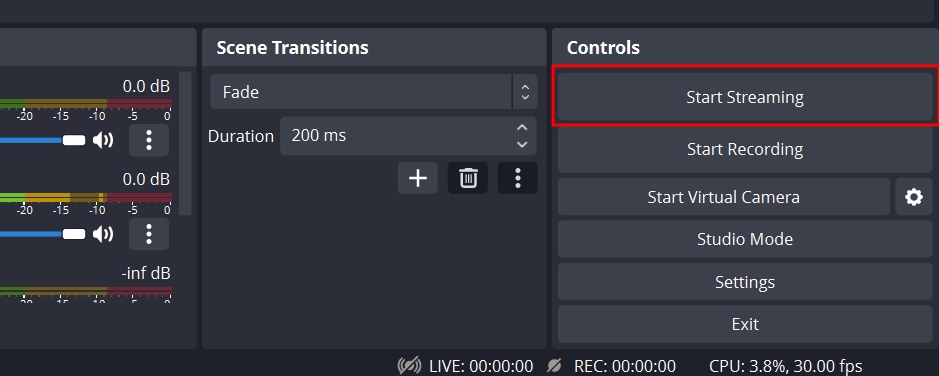
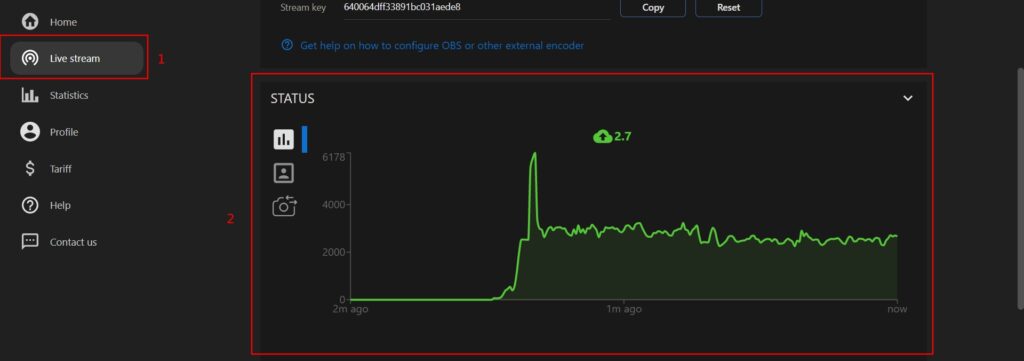
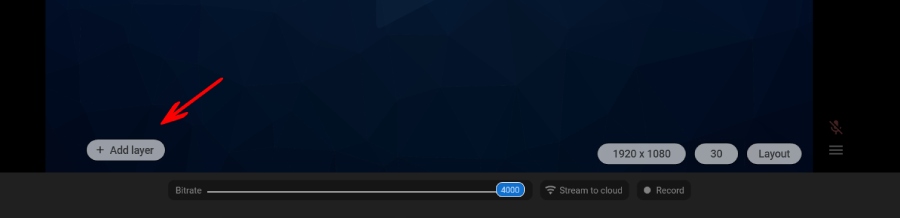
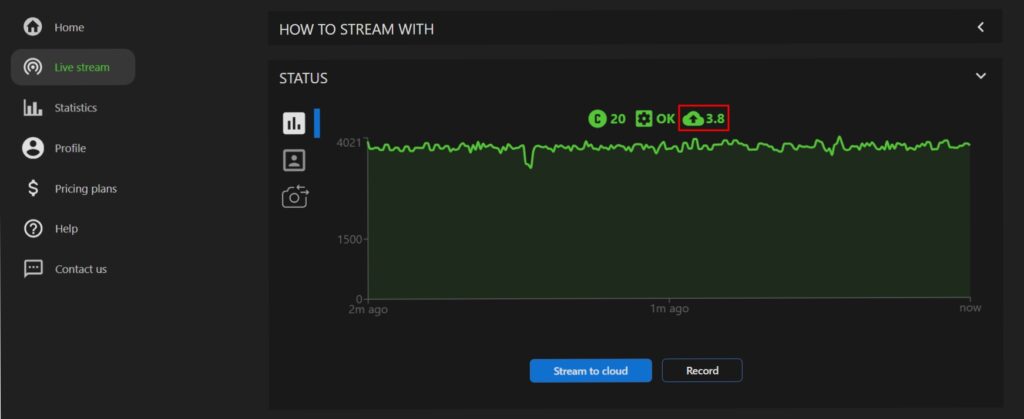
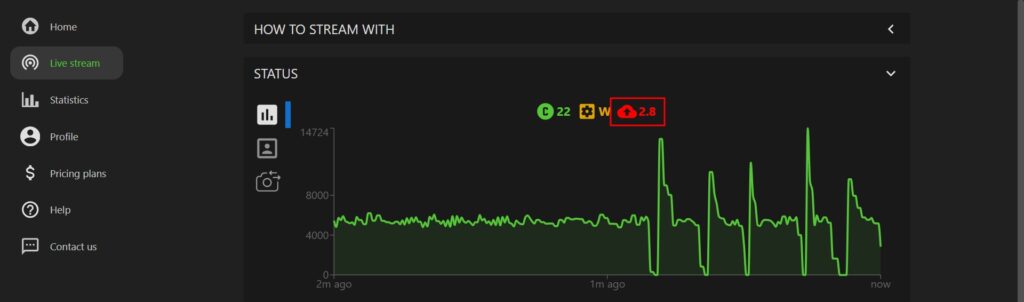
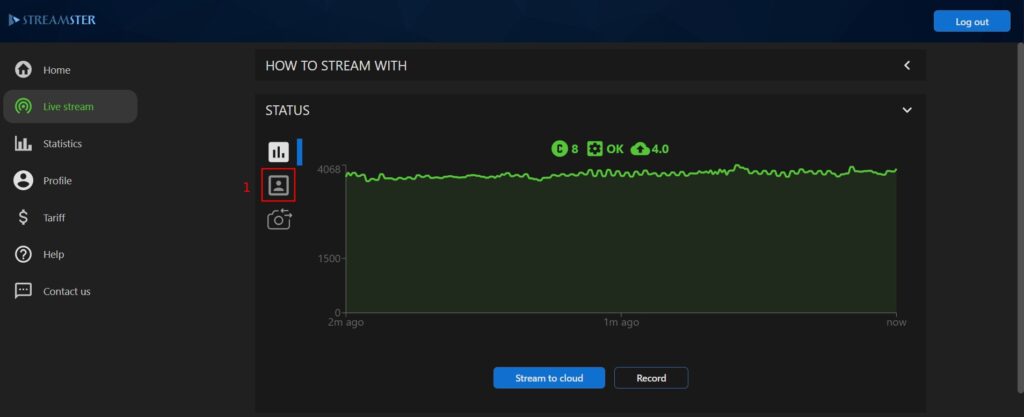
Step 8. Go back to your browser. If the connection is fine, in the Streamster web app you’ll see the current streaming bitrate from the OBS. Alternatively, the bitrate tab can be switched to the video preview (1).
Step 9. Add and set up streaming channels in the Streamster app and launch the live stream to chosen platforms. If you need more information about the channels set up, please read the “Setting up streaming channels” article.
Required Encoder Settings for OBS
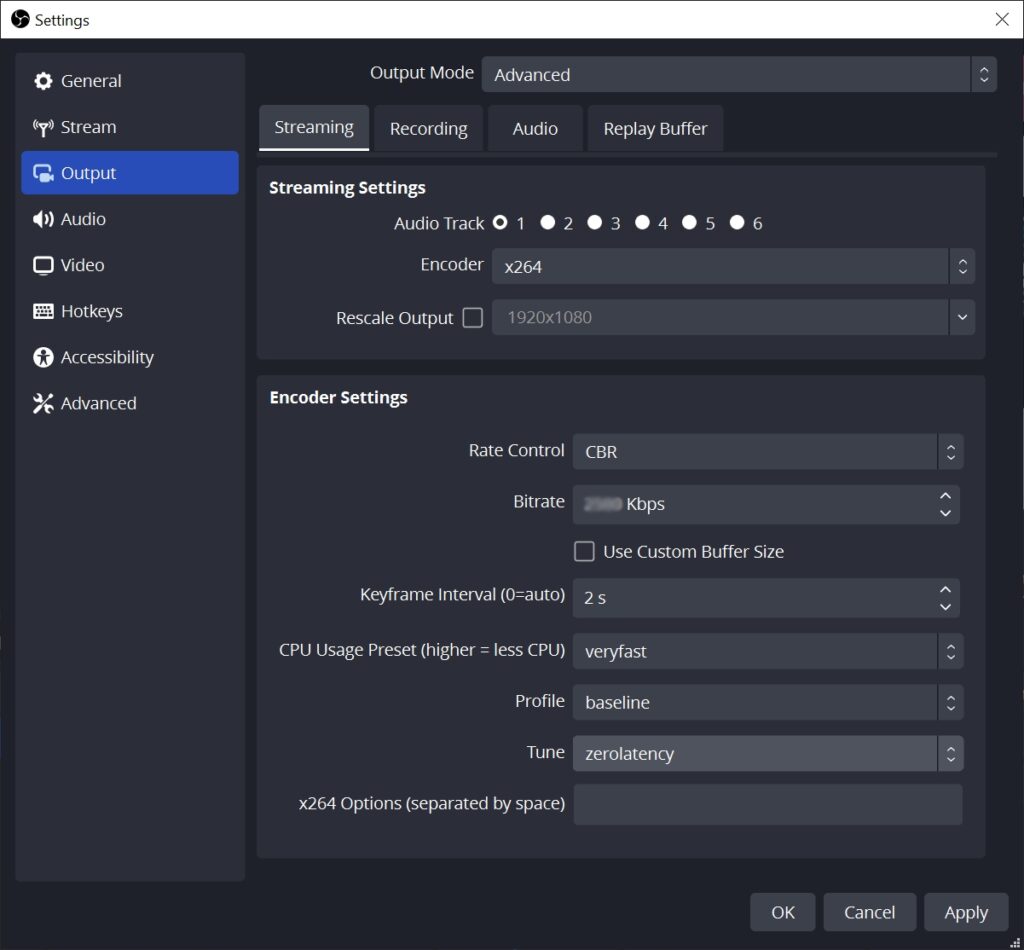
Please make sure that you use required encoder setting for streaming from OBS to Streamster servers. Adherence to these recommendations ensures that your live stream will not have issues.
Please keep in mind that the maximum bitrate for your stream corresponds to your current pricing plan.
x264 Encoder
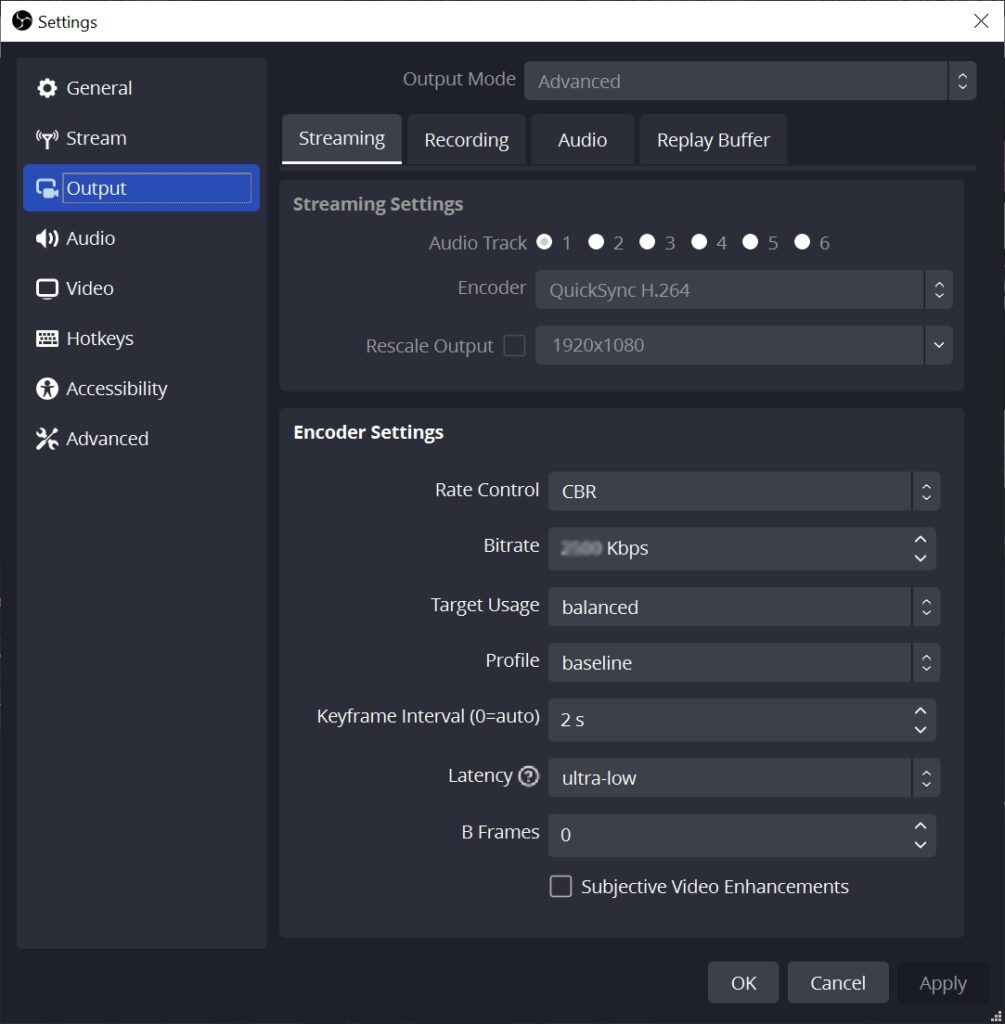
QSV Encoder
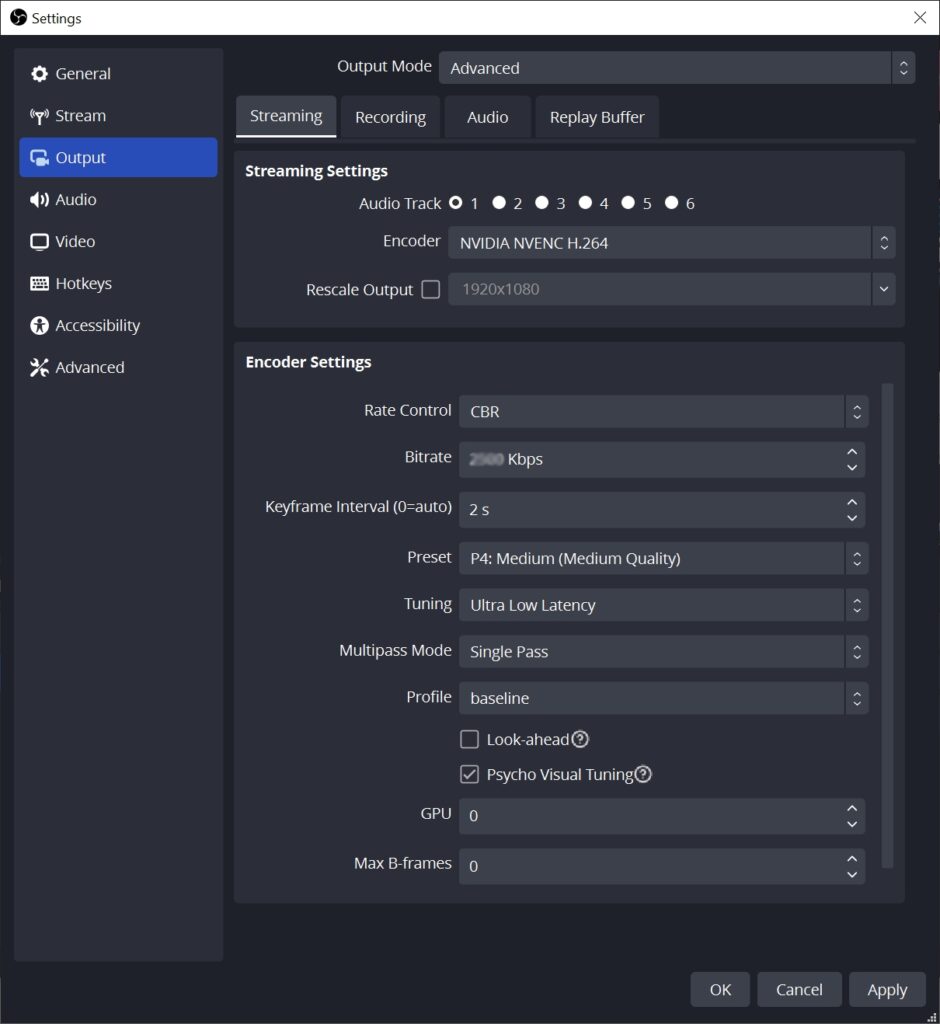
NVIDIA Encoder
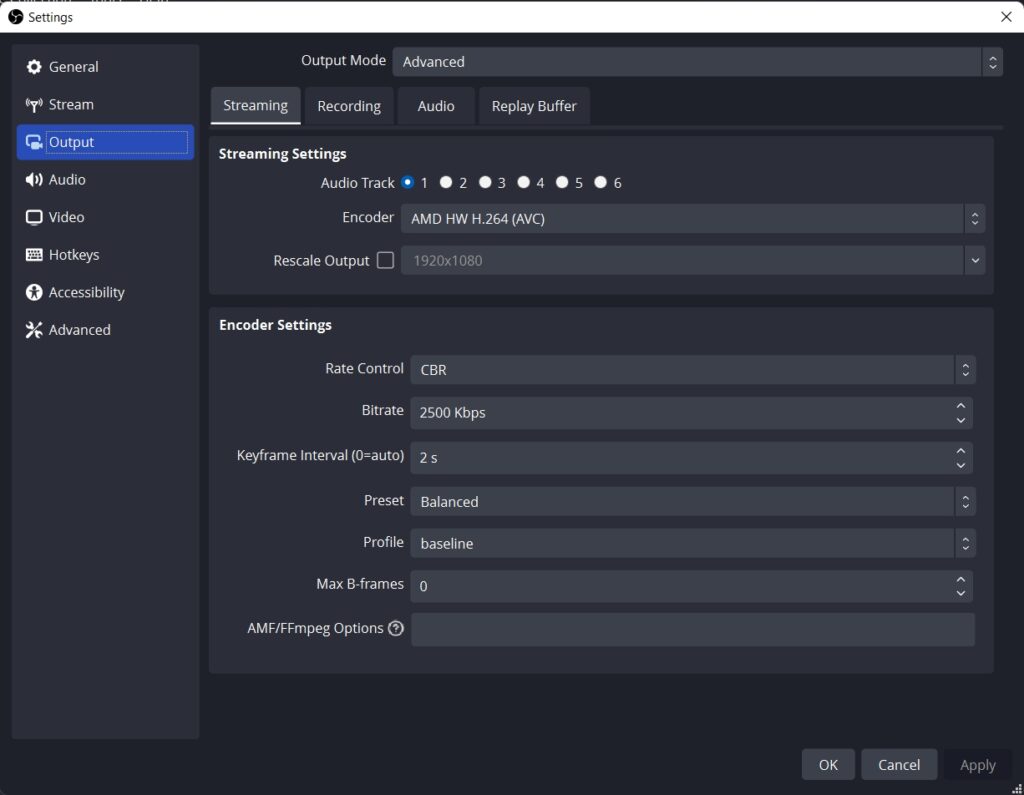
AMD Encoder
Setting Up Streaming Channels
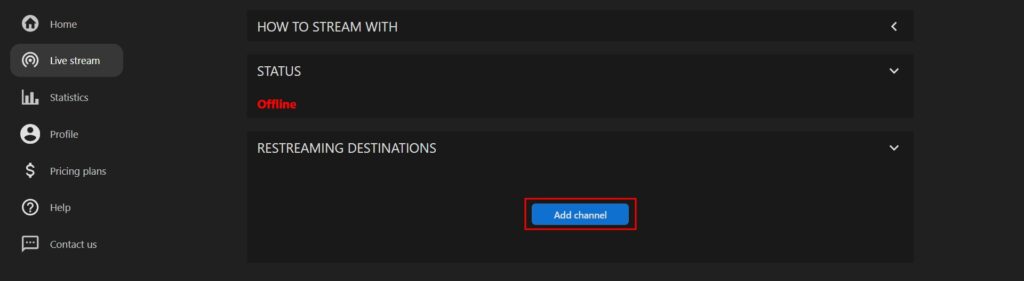
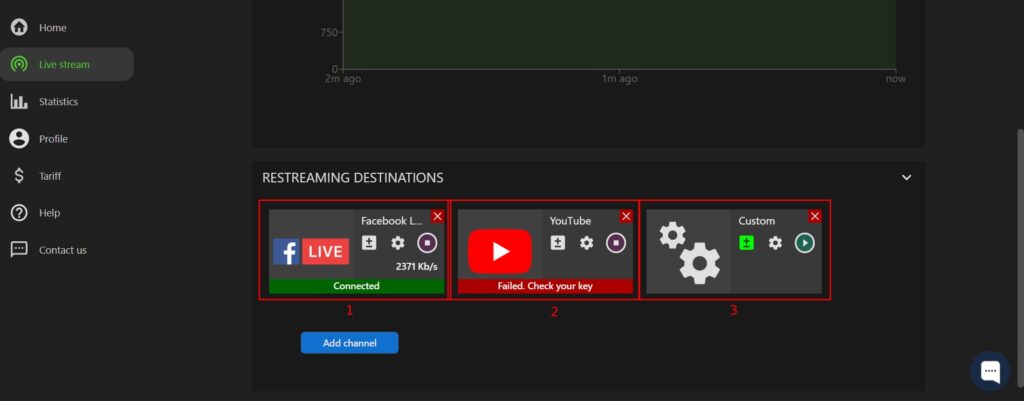
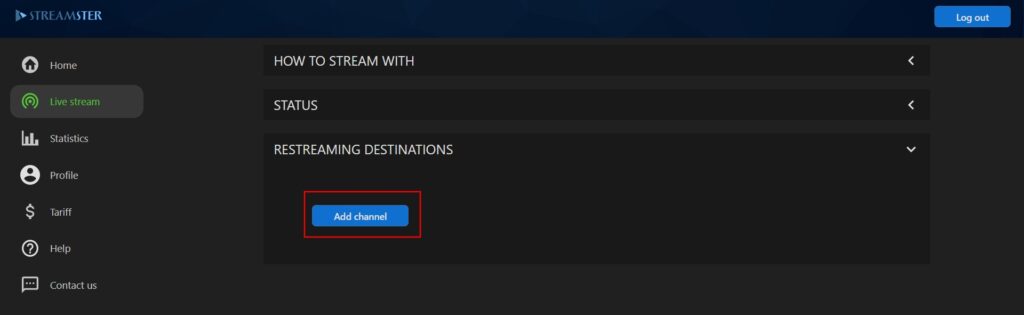
Step 1. Go to the “Live Stream” page (1) and open the “Restreaming destinations” (2) section.
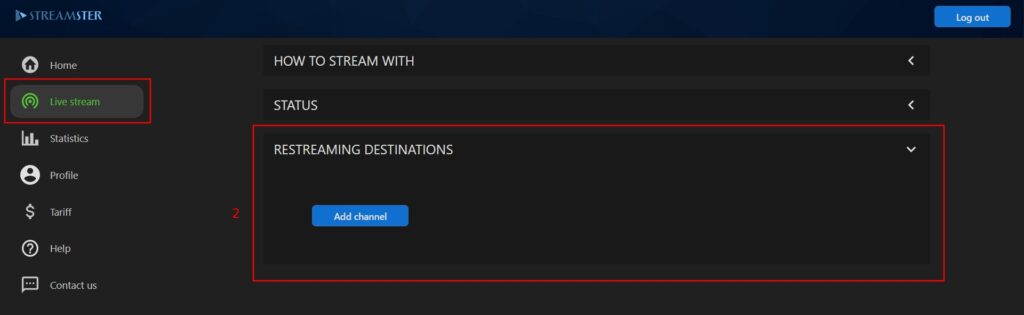
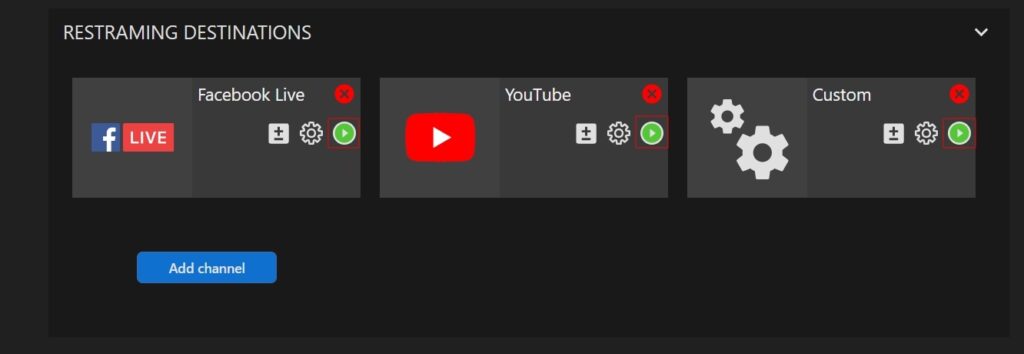
Step 2. Add a new channel by clicking the “Add channel” button. To add the 2nd, 3rd, and more channels click the “Add channel” button once again.
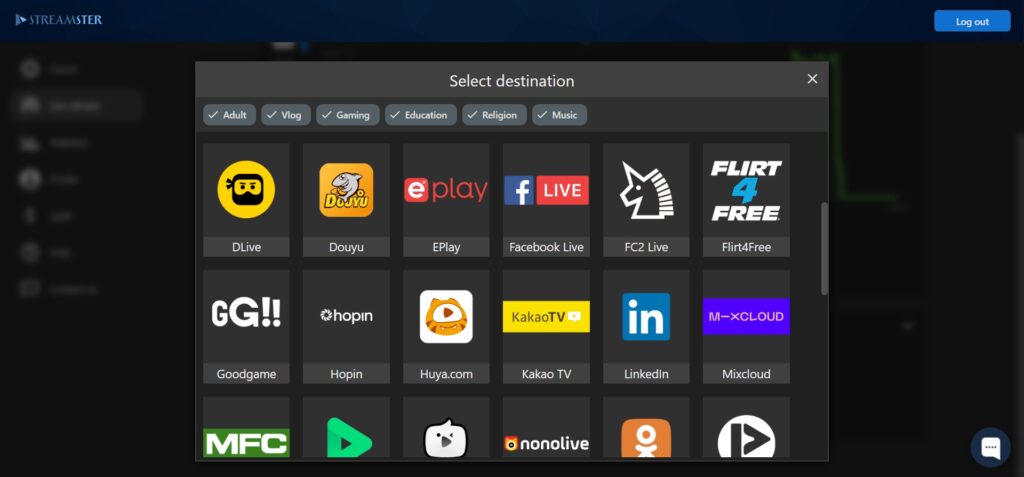
Step 3. Choose the platform from the list. Alternatively, select the “Custom RTMP” channel (it is the first on the list) to stream to the platform that is not on the list.
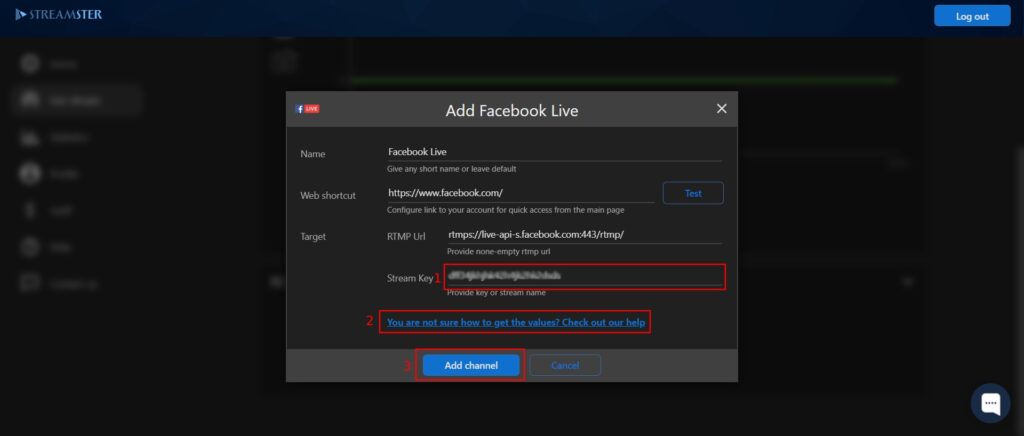
Step 4. Paste the Stream key of your live stream (1), and, if needed, RTMP Url. If you’re not sure where to get this data, please click the tutorial link (2) below. Once all needed data is set, click the “Add channel” button (3).
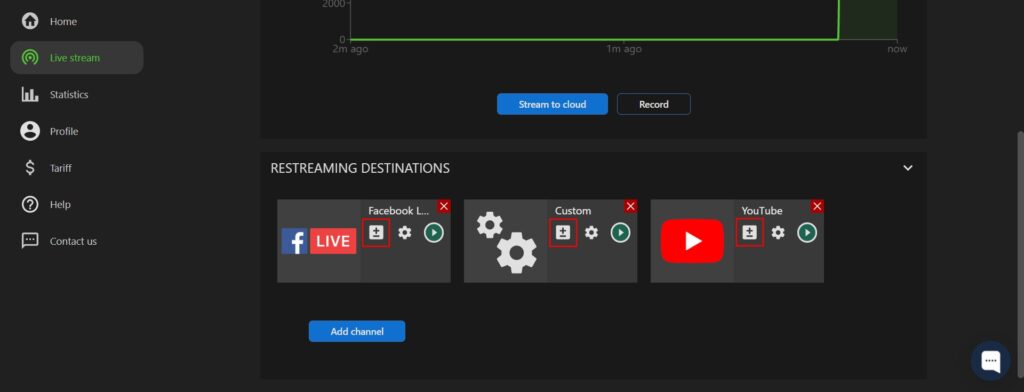
Step 5. If needed, you can edit the channel settings after it was created by clicking the “Settings” button.
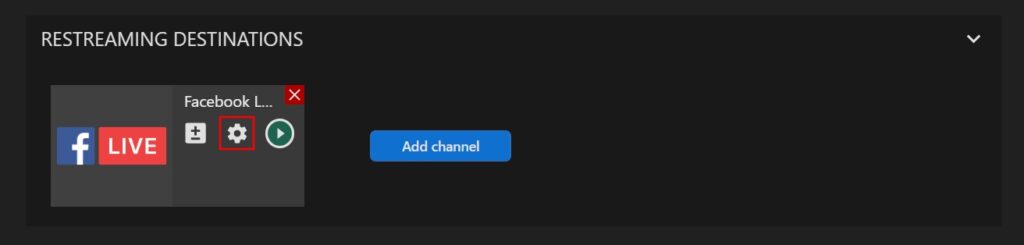
Step 6. To start streaming to the platform, click the “Play” button.

Starting Your Stream with Mobile Device
Step 1. Create your account with Streamster.
Step 2. Log in to the Streamster web app at https://app.streamster.io/ on your PC or Mac.
Step 3. Set up your streaming channels in the web app.
Step 4. Install the Streamster mobile app for Android or iOS on your mobile device.
Step 5. Log in to the Streamster mobile app with the same credentials you used to log in to the web application.

Step 6. Click the “Stream to cloud” button no matter in the mobile app or in the web app.
Step 7. In the mobile app tap on the channel logo to start the stream. Tap on it once again to stop the stream.

Starting Your Stream with GoPro
Step 1. Create your account with Streamster.
Step 2. Set up your streaming channels in the web app.
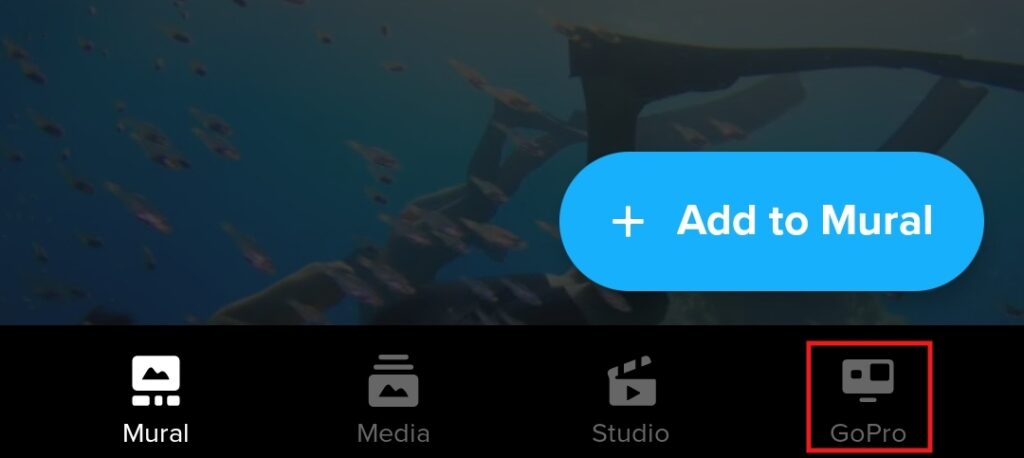
Step 3. Open the https://app.streamster.io in the mobile browser on your smartphone.
Step 4. Tap the “OBS Studio” banner.
")
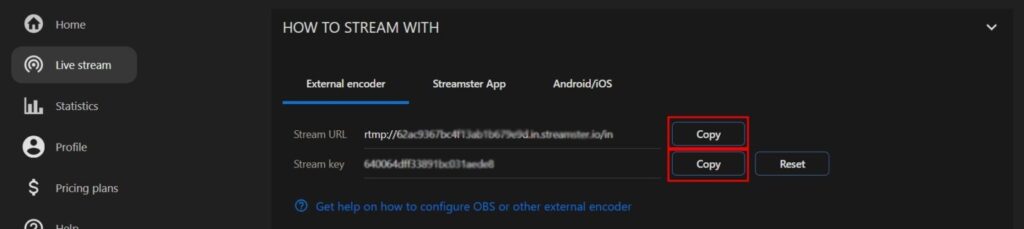
Step 5. Copy the Stream URL for now.
")
Step 6. Launch the GoPro Quik app.
Step 7. Tap the “GoPro” Menu item and connect your camera.
Step 8. Tap the “Live stream” button.
")
Step 9. Select the “Other/RTMP” option.
")
Step 10. Paste the RTMP URL value that you copied in step 5 to the appropriate field.
")
Step 11. Go back to the https://app.streamster.io tab and copy the Stream Key.
")
Step 12. Add the Stream Key to the RTMP URL after as shown on the screenshot and tap the “Continue” button.
")
Step 13. Click the “Go Live” button to start streaming to the Streamster server.
")
Step 14. Go back to https://app.streamster.io and start streaming to platforms by clicking on the platform icon. Alternatively, to control your multistream, you can use Streamster app for iOS or Android.

Starting Your Stream with Zoom
Stream from Zoom with paid Zoom account
Step 1. Log in to your Zoom account in the web browser.
Step 2. Enable the live streaming feature for your meeting or webinar. Go to your Zoom profile and click Settings. Click In Meeting (Advanced) and activate the Allow live streaming meetings option.
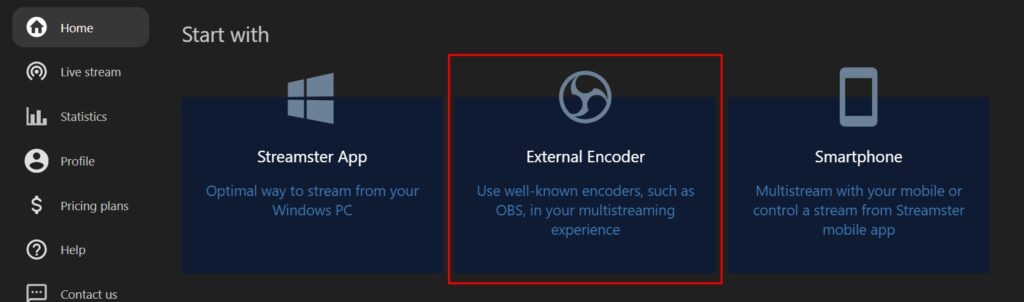
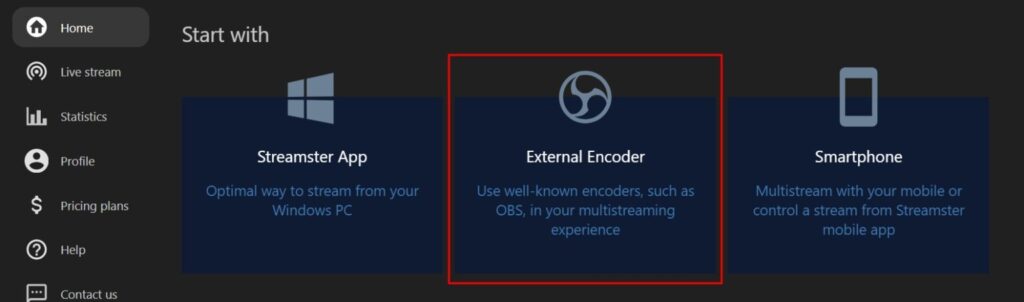
Step 4. Click the “External Encoder” banner.
Step 5. Copy your RTMP URL and Stream Key.

Step 6. Host a meeting or a webinar in Zoom. In the meeting control panel, click More and select Live on Custom Live Streaming Service.
Step 7. Fill in the Stream URL and Stream Key you’ve copied from Streamster.
Step 8. Click the “Go Live” button.
Stream from Zoom with free Zoom account
Streaming Zoom webinar or meeting with free Zoom account is available with Streamster desktop app. More details can be found here.
Starting Your Stream with Wirecast
Step 2. Click the “External Encoder” banner.
Step 3. Find your “Stream URL” and “Stream key” values and copy one of them.
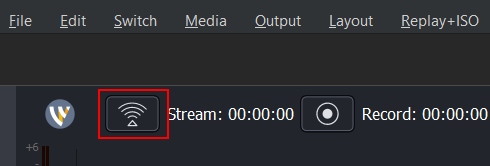
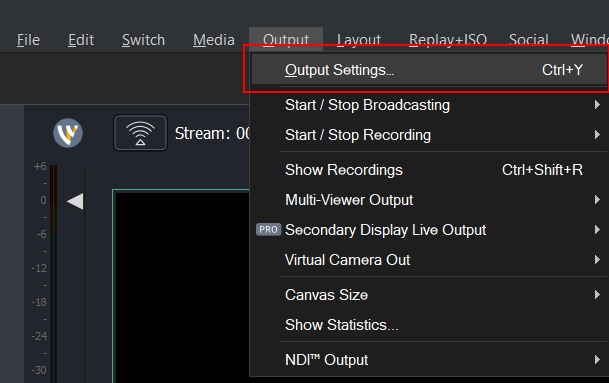
Step 4. Open Wirecast, select the “Output” section in the main menu, and click on the “Output Settings…” option.
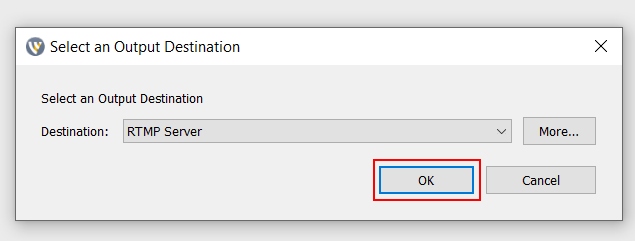
Step 5. Click the “OK” button.
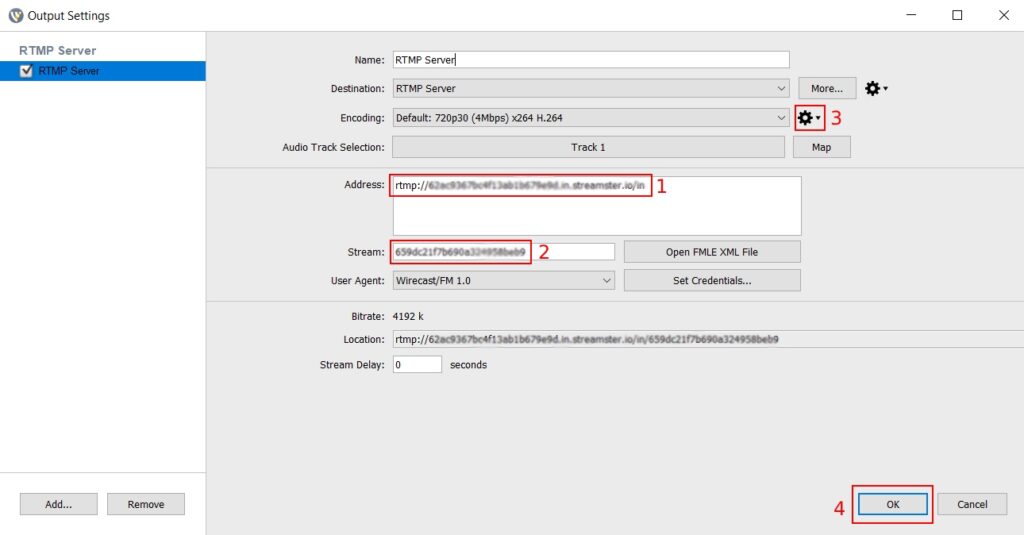
Step 6. Copy your Stream URL from Streamster to the “Address” field in Wirecast (1). Copy your Stream Key to the “Stream” field (2). If needed, change your video preferences (3). Once all set, click the “OK” button (4).
Step 7. Once your stream scene is set up, start your broadcast to Streamster server.